How to Store Emergency Water Long Term and Build Wild Shelters
Most people assume they're ready for a disaster until a 72-hour window proves them wrong. If you want to stay safe, you need to understand Survival Skills: how to store...
How to Store Emergency Water Long Term and Build Wild Shelters
Most people assume they're ready for a disaster until a 72-hour window proves them wrong. If you want to stay safe, you need to understand Survival Skills: how to store emergency water long term, emergency shelter building in wild, bug out bag checklist for beginners, survival mistakes to avoid fire starting, beginner bushcraft skills guide. Real preparedness isn't about hoarding expensive gadgets because it is actually about building reliable systems that work when the grid fails.
The stakes are higher than a simple camping trip. A city-wide water main break can turn your tap water into useless sludge in minutes, and if you're stuck in the woods, a shelter that looks like a house but doesn't trap body heat will leave you shivering and exhausted. Most people fail because they don't understand the physics of heat loss or the chemistry of water purification, making them vulnerable when time is short.
This isn't another list of gear you'll never use. We've combined FEMA's safety standards with the science of calorie density and primitive insulation techniques to create a guide that actually works. By looking at real-world data on water stability and heat retention, we've cut through the noise to find the best ways to stay alive and comfortable.
By the end of this article, you'll know the exact math for long-term water storage, how to build a wild shelter that beats the wind, and which common fire-starting mistakes to avoid so you're never left in the cold.
How to Store Emergency Water Long Term Without It Going Bad
To keep a long-term water supply from going bad, you need to store at least one gallon per person per day in food-grade, BPA-free containers kept in a cool, dark place. According to Ready.gov, this amount covers both basic hydration and essential sanitation for a few days. While pre-packaged bottled water is an option, the safest method for true long-term readiness involves heavy-duty containers that you fill and rotate yourself, paired with a chemical treatment like Aquatabs to handle any unexpected contamination.
What most people overlook is that water storage isn't just about the liquid; it's about building a multi-layered defense. By combining the FEMA volume standards with the chemical stability of purification tablets, you create a system where your static storage is backed up by active treatment. This matters because even the best-sealed container can develop biofilm or bacterial growth over years of sitting on a shelf. Relying on a single source is a risk, but having the ability to treat two quarts of water in just 30 minutes gives you a massive safety margin if your primary jugs are compromised.
Think about a city-wide water main break. Suddenly, the liquid coming out of your kitchen sink is a murky, brown sludge. It is not just unappealing to drink; it is useless for washing your face or cleaning a wound because of the sediment and potential pathogens. In this scenario, your stored supply isn't a luxury - it is your only functional infrastructure. Having that clean gallon ready means you aren't fighting the crowds at a grocery store or trying to filter mud through a coffee filter while the clock is ticking. This is a core part of building a bug out bag checklist for beginners that actually works in a crisis.
There is a common misconception that store-bought plastic water bottles are a set-it-and-forget-it solution. The reality is that thin commercial plastics are permeable and will eventually leach chemicals into the water, especially if stored in a hot garage or under fluorescent lights. Proper long-term storage requires thick-walled containers designed for the task, not the flimsy crinkle-plastic from a supermarket. If you must use store-bought bottles, check the expiration dates and keep them off the floor to prevent floor-borne chemicals from migrating through the plastic.
When comparing the science of purification methods, Aquatabs often beat boiling in a real-world pinch. While boiling is highly effective, it consumes a massive amount of fuel - a resource that might be scarce during a power outage or evacuation. Aquatabs use a specific chemistry that is effective against Giardia, viruses, and bacteria without needing a stove. They have a 5-year shelf life and are small enough to fit in a pocket, making them a more efficient insurance policy for your water supply than a bulky camping burner. Keeping a 30-tablet pack in your grab-and-go kit ensures you can treat water even if you are on the move.
Key insights:
Store a minimum of one gallon per person per day to cover drinking and sanitation.
Use BPA-free, food-grade containers to prevent chemical leaching over time.
Maintain a 30-tablet pack of Aquatabs for a 5-year shelf life backup treatment.
Rotate your water supply every six months to ensure the best possible quality.
Avoid storing water containers directly on concrete to prevent temperature fluctuations.
The Science of Purification: Aquatabs and Boiling
Aquatabs and boiling both kill pathogens, but they serve different roles in a survival kit. Boiling is the gold standard for killing everything from bacteria to protozoa, but it requires a heat source and significant fuel. Aquatabs use sodium dichloroisocyanurate to treat water in about 30 minutes, making them the superior choice for mobile scenarios where you can't stop to build a fire or waste precious fuel.
The real debate isn't about which method is better but which is more sustainable. Boiling a single gallon of water takes a surprising amount of energy - energy that is better spent on warmth or cooking food in a long-term grid-down situation. What this actually means is that chemical purification acts as your primary active defense, while boiling should be reserved as a secondary stationary method when you have a stable fire or stove setup.
Imagine you are evacuating on foot because of a local wildfire. You find a stream, but you are exhausted and need to keep moving to reach a safety zone. Instead of stopping for 20 minutes to set up a stove and wait for water to cool - which uses up your limited canister fuel - you simply drop a tablet into your bottle, shake it, and keep walking. By the time you reach the next milestone, your water is safe to drink.
One thing most guides get wrong is the set and forget mentality with tablets. If your water is murky, the chemicals won't be nearly as effective because the debris shields the microbes. In these cases, you still need a basic pre-filter, like a clean bandana, to clear the water before the chemical reaction can do its job. Also, remember that while these tablets are great for Giardia and viruses, they don't always neutralize Cryptosporidium as quickly as boiling does.
Key insights:
Keep a 30-tablet pack of Aquatabs in your grab-and-go kit for a 5-year shelf life.
Pre-filter cloudy water through a cloth before adding purification tablets.
Wait the full 30 minutes before drinking to ensure the chemicals have neutralized all viruses.
Save boiling for basecamp situations where fuel is abundant and movement isn't required.
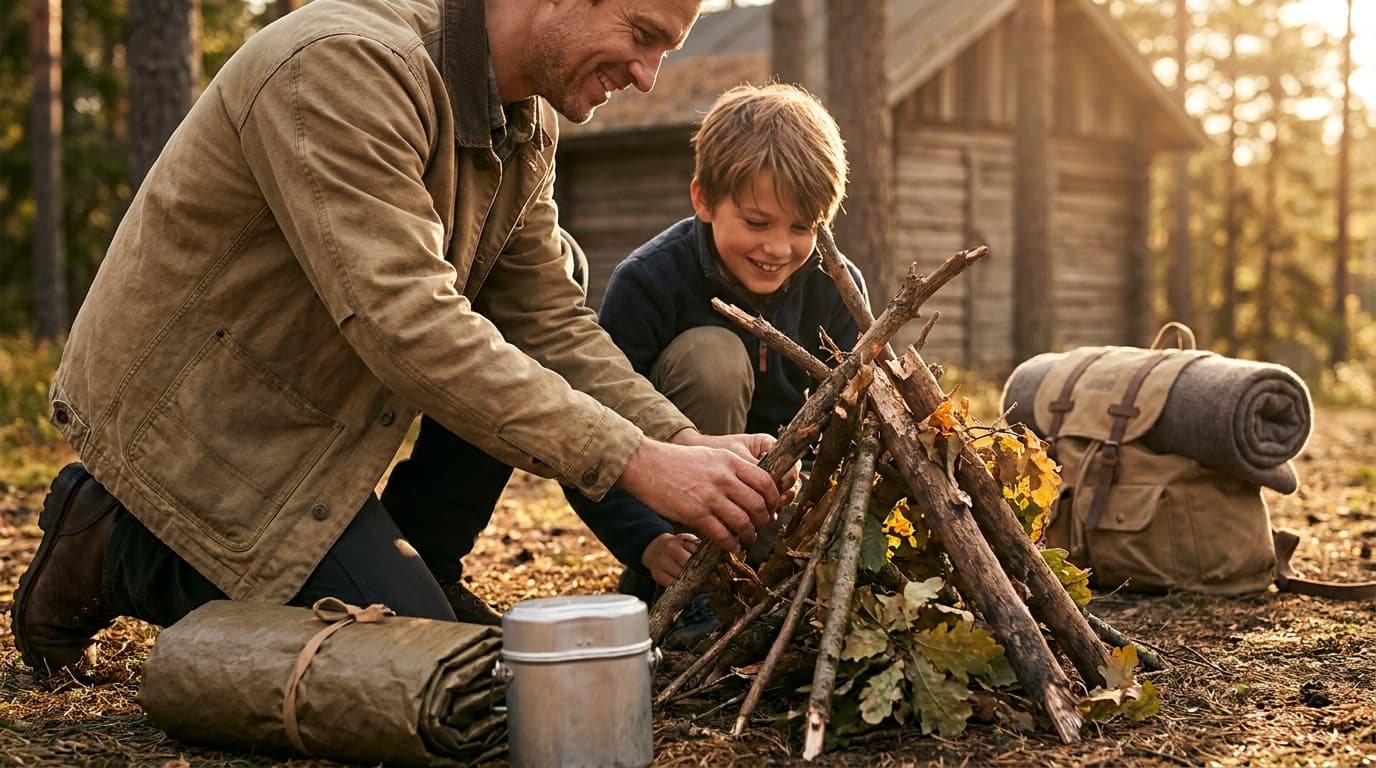
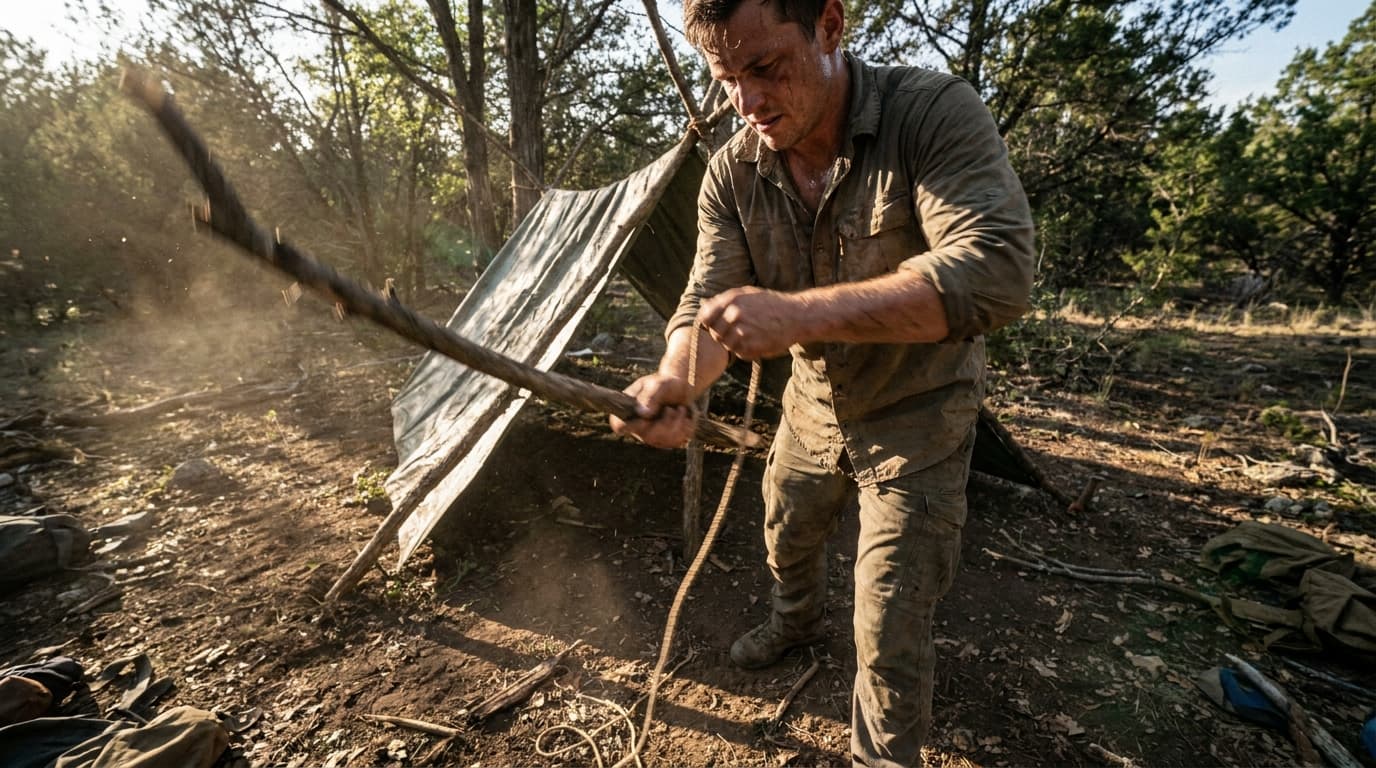
Emergency Shelter Building in the Wild: Staying Warm and Dry
If you find yourself in the woods without a single tool, your first priority is not a roof. It is a bed. Most people think of a shelter as a house, but in a survival situation, a shelter is actually a piece of clothing you crawl into. You can survive being wet for a while, but you cannot survive your body heat being sucked into the frozen ground. This is the most common mistake beginners make when the sun starts to go down.
The science behind this is managing what experts call convective heat loss. The air around you and the ground beneath you are constantly trying to steal your warmth to reach an equilibrium. What this actually means is that the thickness of your floor matters more than the angle of your ceiling. If you do not have a thick barrier of dry material between your skin and the earth, no amount of overhead cover will keep you from hypothermia. You are essentially fighting a battle against the cold ground.
The pattern here is that survival is a game of calories and insulation. Just as Macadamia nuts provide high calorie density to keep your internal engine running, a debris hut acts as external insulation to keep that heat from escaping. You are building a natural sleeping bag. This is why testing your skills before an emergency is so important. As experts often suggest, you should go camping and try these methods with a backup plan before you actually need them to stay alive.
Imagine you are lost after a hike and the sun is dropping fast. You find a sturdy fallen log or a low-hanging branch. You lean shorter limbs against it to create a rib-cage shape just big enough for your body. Then, you pile on at least 12 inches of dry leaves, pine needles, or grasses. When you crawl inside that debris sandwich, your own body heat stays trapped in the tiny air pockets between the leaves. This setup can keep you warm even if the temperature outside hits freezing.
One thing most guides get wrong is the bigger is better mentality. Beginners often build shelters that look like cabins because they want to feel at home. The catch is that a large shelter has too much dead air space. Your body cannot heat up a whole room, but it can heat up a small pocket of air. If you can sit up and move around comfortably in your shelter, it is probably too big. You want it to be a tight fit so your body heat stays right against your skin.
Also, remember that while a shelter keeps you warm, it does not solve hydration. Even in a cold shelter, you are losing water through breathing. Make sure you have a way to treat water, like using Aquatabs which take about 30 minutes to work, so you stay hydrated while you wait out the night. Individual survival needs vary based on your health, so always consult with a professional instructor if you have specific medical conditions that affect how you handle cold. You can find more tips in our guide on Essential Survival Skills For Staying Safe In The Wilderness.
Key insights:
Build your bed at least 6 to 12 inches thick using dry debris to block ground chill.
Keep the interior space as small as possible to trap your body heat effectively.
Use a shingling method with branches and leaves so rain slides off the sides.
Avoid using green wood or wet leaves because moisture will pull heat away from you.
Check for overhead hazards like dead branches before picking your shelter spot.
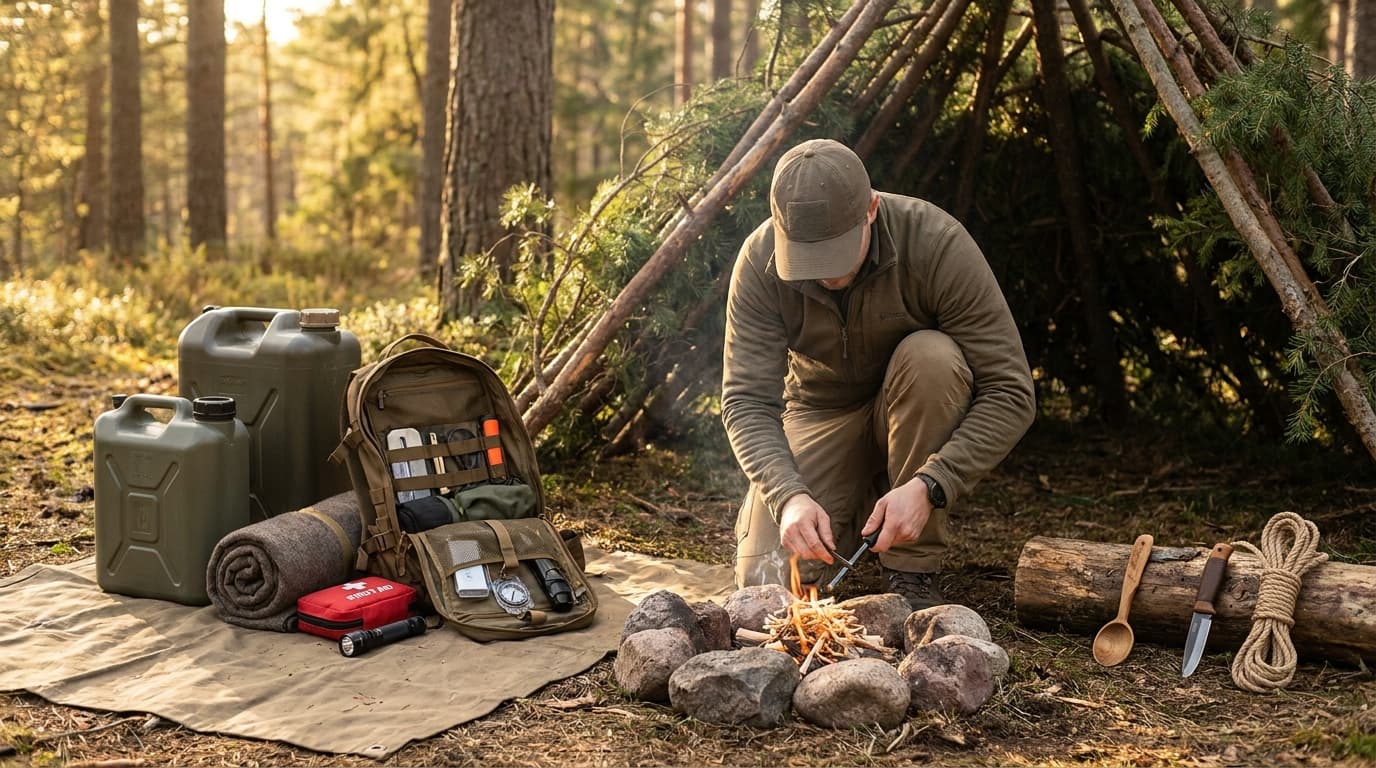
The Bug Out Bag Checklist for Beginners: Efficiency Over Weight
A beginner bug out bag must prioritize three non-negotiable pillars: hydration, high-density nutrition, and analog navigation. You need at least one gallon of water per person daily and a total of 7,500 calories for a 72-hour window. Beyond food and water, you must include a 72-hour supply of prescription medications and a physical 1:24,000 topographic map of your local area. While digital tools are convenient, a physical map is the only tool that works when batteries die and cell towers fail during a large-scale evacuation. Because health needs are personal, always talk to your doctor about how to safely store and rotate your specific prescription medications for an emergency.
The secret to a manageable bag is choosing efficiency over sheer weight. Most people pack heavy canned goods or complex MREs, but Macadamia nuts provide approximately 8.2 calories per gram, making them one of the most weight-efficient survival foods available. This same logic applies to your navigation tools. A 1:24,000 scale map is the standard for foot travel because it allows you to identify specific terrain features that a standard road atlas would miss. What this actually means is that your bag stays light enough to carry for miles without sacrificing the data you need to find a safe route around blocked roads or flooded paths.
Imagine a scenario where a sudden flash flood or wildfire forces you to leave your home in minutes. You grab your bag and head for the hills, but as thousands of others do the same, the local cell network crashes under the weight of the traffic. Your phone's GPS spinning wheel becomes a symbol of your vulnerability. In this moment, the person with a physical map and a basic compass is the only one who can move with confidence. If you've already spent time learning Why This Beginner Wilderness Survival Guide Makes Survival Skills Simple, you'll know exactly how to orient that map to the landmarks around you.
One thing most guides get wrong is the obsession with 'survival gadgets' that look cool in a catalog but have never been tested in the field. The catch is that a fancy magnesium fire starter or a complicated water filter is a liability if you haven't used it until your hands are cold and shaking. Many beginners fall into the trap of buying pre-made kits filled with low-quality tools they don't understand. It is far better to have a simple lighter and a pack of Aquatabs - which take just 30 minutes to treat two quarts of water - than a high-tech gadget that requires a manual to operate. For more on building a reliable kit, check out our Bug Out Bag Checklist For Beginners Your 72 Hour Survival Guide.
When fueling your body for a 3-day trek, focus on calorie density and shelf stability. Peanut butter and Macadamia nuts beat heavy MREs because they offer high fat content, which provides the sustained energy required for physical exertion. Aim for that 7,500 kcal target for your 72-hour bag to ensure your brain stays sharp enough to make critical decisions. Also, remember that even the best survival food has an expiration date. Set a recurring reminder to rotate your food and water supplies every six months to ensure freshness and to check that your vacuum seals haven't been compromised by temperature changes in your storage location.
Key insights:
Aim for 2,500 to 3,000 calories per day using high-fat foods like nuts and peanut butter to maximize energy while minimizing weight.
Pack a physical 1:24,000 topographic map of your region to ensure you can navigate even when GPS and cell service are unavailable.
Include a minimum 72-hour supply of all essential prescription medications in a waterproof container.
Test every piece of gear in your backyard or on a local trail before you ever need to rely on it for a real emergency.
Rotate your food and water supplies every six months to prevent spoilage and ensure your gear remains in working order.
Fueling the Body: Calorie Density and Nutrition
For a 72-hour survival bag, you need 7,500 calories to maintain physical stamina and mental clarity. While beginners often reach for bulky MREs, the most efficient way to hit this target is through high-fat foods like Macadamia nuts and peanut butter. Macadamia nuts are a survival powerhouse, offering 8.2 calories per gram, which is nearly double the efficiency of standard emergency life raft bars.
This shift toward high-fat, ready-to-eat options is a smart trend in modern prepping. It means you carry significantly less weight while receiving more metabolic fuel. Traditional MREs often require extra water or chemical heaters, adding weight and complexity you do not need when moving fast. By prioritizing fats, you provide the body with long-burning energy that keeps your brain sharp during high-stress moments.
Imagine evacuating on foot during a cold rainstorm. Instead of fumbling with a stove or a heavy meal pouch while shivering, you reach for a squeeze packet of peanut butter. This immediate access to high-density fuel helps maintain your core temperature and energy levels when you cannot afford to stop or rest in the wild.
The catch is that high-fat foods can go rancid if stored in high-heat environments like a car trunk. You should also include a 72-hour supply of any prescription medications in your kit. Since individual health needs vary, it is worth consulting your doctor about the best way to store specific medications long-term. For more gear tips, see our Bug Out Bag Checklist For Beginners Your 72 Hour Survival Guide.
Key insights:
Target 2,500 to 3,000 calories per day to ensure you have enough energy for heavy physical exertion.
Choose high-fat survival foods like pecans or Macadamia nuts to maximize your bag's weight-to-calorie efficiency.
Rotate your food and water supplies every six months to check for expiration dates and seal integrity.
Pack a 72-hour supply of essential medications in a waterproof container alongside your food kit.
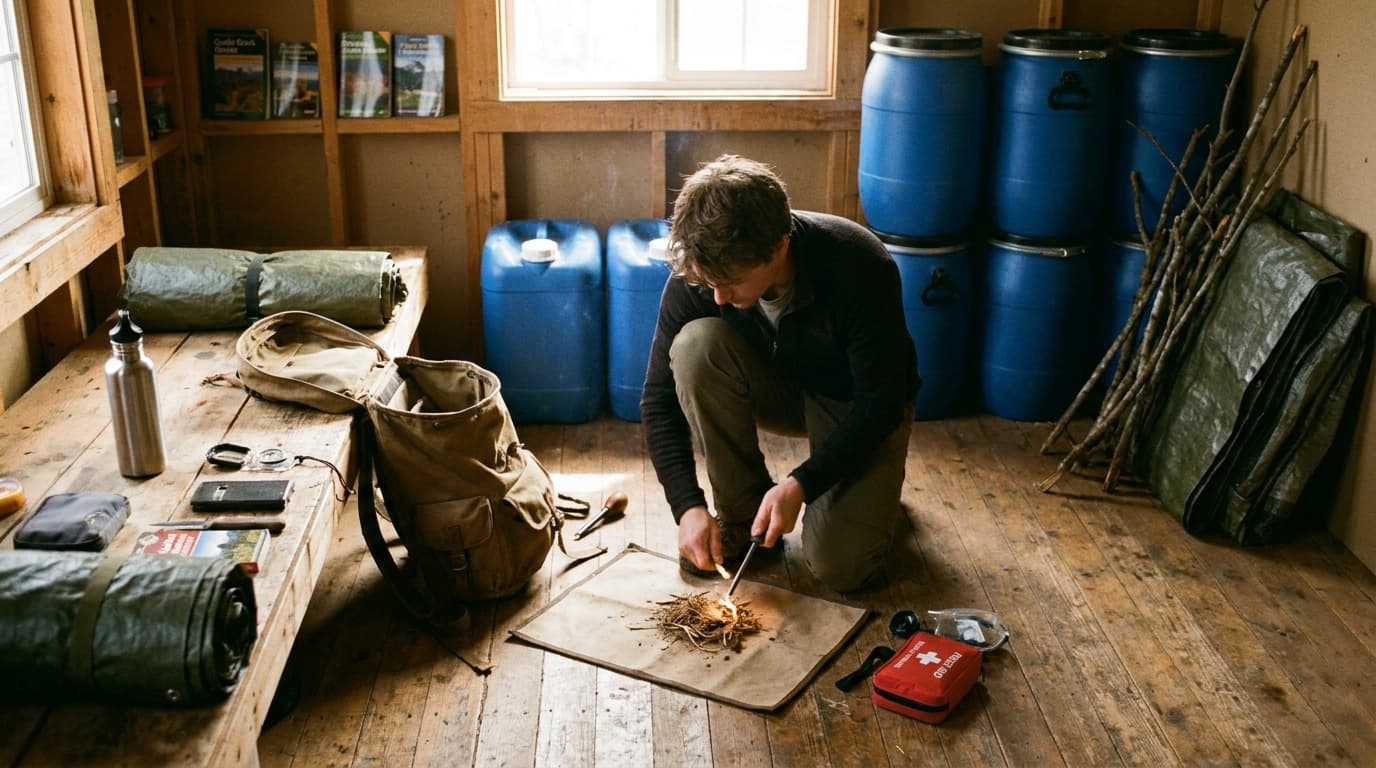
Survival Mistakes to Avoid When Starting a Fire
Most beginners fail to start a fire in damp or windy conditions because they treat fire like a light switch rather than a delicate chemical chain reaction. When moisture or wind is present, the heat from your initial spark or match is quickly sucked away before it can actually ignite the wood. The biggest mistake is skipping the pencil-lead sized kindling - those tiny, dry twigs that are thin enough to catch fire instantly. Without this bridge between your spark and your fuel, your fire will sputter out every single time, no matter how many matches you strike.
What this actually means is that fire starting is 90% preparation and only 10% execution. Most people overlook the fact that you aren't actually burning the wood itself; you are burning the gases released by the wood when it gets hot enough. In wet conditions, your heat source is busy evaporating water instead of creating gas. This is why you need a massive amount of surface area - meaning very thin sticks - to generate enough concentrated heat to overcome the dampness. If you don't have a survival fire starting kit for beginners that includes dry tinder or a way to shave down wet wood to its dry core, you are fighting a losing battle against physics.
Imagine you are caught in a sudden downpour, your hands are shaking from the cold, and you have exactly one match left in your pocket. You find a thick, damp log and desperately hold the flame against the bark, hoping it will catch. Within seconds, the match burns down to your fingers, the log hasn't even scorched, and you are left in the dark. This is the single match fallacy. In a real survival situation, that match should have been used to light a bird’s nest of dry grass or shaved wood curls that you spent twenty minutes protecting under your jacket, which then lights the tiny twigs, which eventually lights the log.
One thing most guides get wrong is the over-reliance on standard lighters. While a Bic is convenient, it can fail in freezing temperatures or if the flint gets wet. The catch is that while a ferrocerium rod is much harder to use for a novice, it is often the only tool that produces a 3,000-degree spark even after being submerged in a river. However, don't just buy a rod and toss it in your bag. As noted in our essential survival skills guide, gear is useless if you haven't practiced with it. A ferro rod requires specific technique and very fine tinder to work, whereas a lighter is better for fair weather emergencies.
It is also worth noting that your choice of clothing can impact your fire-starting success. If you are wearing cotton, which retains moisture and cools the body down, your fine motor skills will degrade rapidly as hypothermia sets in. Switching to synthetic or wool layers helps you stay warm enough to focus on the tedious task of gathering tiny fuel. This is a perfect example of why testing your gear in real-world conditions is more important than just owning a fancy kit. You need to know how your body and your tools react when everything is wet and the wind is howling.
Key insights:
Collect three times as much small tinder as you think you need before striking your first spark.
Use a knife to shave away the wet outer bark of sticks to reach the dry heartwood inside.
Block the wind using your body, a log, or a small rock wall to protect the fragile initial flame.
Carry at least two different ignition sources, such as a waterproof lighter and a ferrocerium rod.
A Beginner Bushcraft Skills Guide for Navigation and Tools
The foundational bushcraft skills every beginner should master first are land navigation and basic tool management. While many people focus on flashy skills like friction fire or building elaborate camps, knowing how to move through the woods without getting lost is the most vital part of staying safe. Navigation is essentially the preventative medicine of the survival world. If you can read the terrain and keep yourself on track, you will likely never find yourself in a situation where you need to build an emergency shelter or signal for a rescue helicopter.
What this actually means is that your map and compass are your primary safety net. Most people overlook the fact that a 1:24,000 scale topographic map is the standard for navigating effectively on foot. At this scale, one inch on the map represents 24,000 inches on the ground, providing enough detail to identify small ridges, gullies, and streams. When you combine this with a reliable compass, you aren't just looking for North; you are calculating your position relative to the landscape. This kind of situational awareness is what separates a prepared woodsman from someone who is just wandering. It is about managing your energy and time so you never reach the point of exhaustion or panic.
Imagine you are hiking through a dense forest and a thick fog rolls in, obscuring the trail and making every tree look identical. Instead of guessing which way to walk, you pull out your 1:24,000 map and identify a prominent ridgeline that you know leads back to a main forest road. By taking a bearing with your compass and following that specific angle, you can walk with confidence through the mist. You aren't hoping to find your way; you are using a mathematical tool to ensure you hit a 'handrail' - a long, linear feature like a road or river - that will take you home. This is why essential survival skills for staying safe in the wilderness always prioritize the mental game of navigation over the physical work of building.
A common misconception is that bushcraft is mostly about carving spoons or making decorative camp furniture. While those skills are great for practice, real bushcraft is the art of understanding terrain and resource management. The catch is that even the best gear is a liability if you haven't tested it. As noted in the SurvivalSkills.Guide bug out bag list, a compass is useless if you don't know how to adjust for magnetic declination or read a legend. Relying solely on a GPS app is another rookie mistake. Electronics fail, batteries die in the cold, and screens shatter, but a paper map and a baseplate compass will work in any weather as long as you have the skill to use them.
Beyond just maps, your tool kit should include communication devices like a BaoFeng UV-5R radio. While you need a HAM license to transmit, anyone can use these to receive NOAA weather alerts or listen to local emergency frequencies. This provides a different kind of navigation - navigating through a changing situation. Knowing a storm is three hours away allows you to find a safe spot and set up before the environment becomes hostile. In the end, bushcraft is about being proactive rather than reactive, using your tools to stay one step ahead of the elements.
Key insights:
Learn to read contour lines on a topographic map to visualize elevation changes before you start walking.
Practice taking a bearing on a known landmark in your neighborhood to build muscle memory with your compass.
Always carry a physical 1:24,000 scale map of your area in a waterproof bag to prevent it from becoming a soggy mess in the rain.
Trust your compass over your 'gut feeling' when you feel disoriented, as your internal sense of direction is easily fooled by thick brush or fog.
Identify 'catch features' on your map, such as a major river or highway, that will let you know if you have traveled too far in the wrong direction.
Don't Forget the Rest: Pets, Infants, and Storage Locations
Scaling survival planning for a whole family requires moving beyond a single backpack in the closet and adopting a distributed system. According to Ready.gov, the most effective way to guarantee access to gear is a three-location strategy: home for a grab-and-go scenario, your workplace for a 24-hour stay, and your vehicle for a stranded scenario. This setup ensures that whether a disaster strikes during your commute or while you are at your desk, you have the specific supplies needed for infants and pets who cannot pack for themselves.
The pattern here is that most people overlook the fact that survival is not just about gear; it is about location-based redundancy. If you spend a third of your life at work, a kit at home is effectively non-existent during those hours. What this actually means is that your vehicle's get-home bag is often your most important asset. When you scale this for a family, you have to do the math on calories and hydration. You can find a detailed breakdown of these essentials in our Bug Out Bag Checklist For Beginners Your 72 Hour Survival Guide. With FEMA recommending a minimum of one gallon of water per person per day, a family of four needs twelve gallons just for a three-day window. When you add a pet to that equation, the weight and volume of your storage locations must increase significantly.
Imagine being caught in a sudden evacuation order while your spouse is at work and the kids are at daycare. If your only supplies are in a single heavy bin in the garage, you are already behind. A better scenario is having a get-home bag in your trunk that includes high-calorie snacks like macadamia nuts - which offer a massive 8.2 calories per gram - and a small bag of kibble for the dog. Having these distinct storage locations means you can meet at a pre-arranged spot with the essentials already covered, rather than fighting traffic to get back to a single point of failure at home.
The catch that most guides get wrong is the one-size-fits-all approach to clothing and food. Cotton clothing is a massive liability in survival situations because it holds moisture and leads to hypothermia; you should switch every family member to wool or synthetic layers immediately. Also, while macadamia nuts are a calorie-dense miracle for humans, they are actually toxic to dogs. You have to be very careful about cross-contamination in your kits. It is also vital to pack at least a 72-hour supply of prescription medications, though an extended evacuation might require even more. Since individual health needs vary, always check with your doctor or vet to ensure your medical supplies are up to date.
Thinking about these logistics now saves you from making frantic decisions during a real emergency. It is about building a system that works for your specific life, not just following a generic checklist. By distributing your gear across your home, car, and office, you create a safety net that follows you wherever you go. For more tips on preparing for specific environments, check out our guide on Survival Scenarios Best Gear For Cold Woods Mistakes And Home Power Outage Tips.
Key insights:
Audit your kits every six months to replace expired pet food and check that infant clothes still fit.
Store a 24-hour emergency kit at your workplace and a more robust 72-hour kit in your vehicle's trunk.
Replace all cotton socks and base layers with wool or synthetics to prevent moisture-related heat loss.
Include a physical 1:24,000 scale topographic map of your local area in your car kit for when GPS fails.
Pack a 72-hour supply of specialized items like infant formula, diapers, and pet medications in every location.
Frequently Asked Questions
You can usually keep tap water for about six months before you should think about rotating it out for a fresh supply. While water itself doesn't technically expire, the plastic containers can start to leach chemicals into the liquid over time, especially if they are sitting in a warm garage or under direct sunlight. According to safety guidelines from Ready.gov, you should aim to have at least one gallon of water per person for each day to cover both your drinking and basic cleaning needs.
Here is the thing most people miss: you need to use food-grade containers that are thoroughly cleaned first. If you just grab an old milk jug, the leftover proteins can lead to bacterial growth even if you rinsed it well. It is also smart to store your bottles in a dark, cool place to keep the plastic stable and prevent algae from growing. Of course, since water quality varies by location, you might want to talk to your local utility provider if you have specific concerns about your tap water treatment or mineral content.
In the survival world, there is a common saying that cotton kills, and it is because this fabric is a major liability when it gets wet. Unlike wool or synthetic materials, cotton fibers soak up a massive amount of moisture and hold onto it instead of letting it evaporate. When you are out in the elements, a wet cotton shirt will pull heat away from your body much faster than the air around you, which can lead to hypothermia even in surprisingly mild temperatures.
You will find that once cotton gets damp from rain or even just your own sweat, it loses all its ability to keep you warm and becomes heavy and chafing. Most experienced hikers prefer wool or synthetic socks and underwear because they dry quickly and stay warm even when they are damp. It is a good idea to test your layers during a short camping trip before you rely on them for a real emergency to see how they handle moisture and movement. If you are dealing with a specific medical condition that affects how you regulate body temperature, definitely check with your doctor about the best fabrics for your health needs.
You should aim to pack about 2,500 to 3,000 calories for every person, every day. For a standard 72-hour bag, this means you need a total of at least 7,500 calories. In a high-stress survival situation, your body burns energy much faster than it does during a normal day at home. If you are hiking over rough hills or building a shelter in the cold, those calories act as the fuel that keeps your brain sharp and your muscles moving.
A lot of people make the mistake of packing heavy canned goods or complex meals that require lots of water to cook. Instead, look for food that is very calorie-dense for its weight. For example, macadamia nuts are one of the best survival foods because they provide about 8.2 calories per gram. This helps you keep your pack light while still getting the energy you need. Of course, it is a good idea to talk with a doctor or a nutritionist to see what your specific body needs for high-output activities, especially if you have health conditions like diabetes.
Yes, carrying a physical map is absolutely necessary because technology can fail when you need it most. Phones run out of battery, screens break in the rain, and GPS signals can be blocked by heavy tree cover or deep canyons. While digital apps are great for convenience, a paper map never needs a charge and won't stop working if a cell tower goes down. For walking through the woods, you want a 1:24,000 scale topographic map because it shows the fine details of the land like ridges and streams.
But here is the thing that most people miss: a map is just a piece of paper if you have not practiced with it. You need to know how to read contour lines and use a compass before a real emergency happens. Also, remember that your safety is the top priority, so consider taking a basic land navigation course from a local expert to make sure you can find your way home. Try going on a local hike and navigating with just your map while keeping your phone in your pocket as a backup to build your confidence.
Conclusion
Survival prep often feels like a race to buy the coolest gear, but the real secret is much simpler. It is about building a reliable system for water, warmth, and movement. When you look at everything we have covered, from the chemistry of water storage to the physics of a debris hut, a clear pattern emerges. True preparedness is not about having a basement full of stuff you do not know how to use. It is about having a few high-quality tools and the actual skills to keep yourself alive when the grid or the weather turns against you. Knowledge weighs nothing, but it is the only thing that actually keeps you safe when things go wrong.
While we are seeing more digital survival tools and offline maps, the most important trend is actually a return to basics. High-tech gadgets fail when the battery dies or the screen cracks, but a physical compass and a well-packed bug out bag do not need a signal. People often overlook the fact that survival is as much about managing your calories and your body heat as it is about finding your way home. In the coming years, the people who thrive during emergencies will be those who balanced modern convenience with old-school bushcraft skills like fire-starting and map reading. Even as technology changes, the physics of staying warm and hydrated remains exactly the same.
Your first move right now should be a small one: go check the expiration date on your emergency water or rotate the snacks in your 72-hour kit. Do not wait for a storm to realize your batteries are dead or your water tastes like plastic. Survival is not a one-time event you finish; it is a mindset you practice every day. The best time to test your gear was yesterday, but the second best time is right now. Being ready for the worst is the best way to live your life with total peace of mind.
Every WilderReady guide is researched, written, and fact-checked in-house against trusted references such as the American Red Cross, the National Park Service, and the CDC before it goes live. We publish under this shared byline instead of invented personas, so you always know who stands behind the guidance you are reading.