How to Pick a Campsite That Won't Flood Overnight, Even in Heavy Rain
Learning how to pick a campsite that won't flood overnight comes down to one habit: choosing slightly elevated, well-drained ground at least 200 feet from water, with no dry creek...

How to Pick a Campsite That Won't Flood Overnight, Even in Heavy Rain
Learning how to pick a campsite that won't flood overnight comes down to one habit: choosing slightly elevated, well-drained ground at least 200 feet from water, with no dry creek beds, debris lines, or low dips nearby.
Most flooded tents aren't bad luck. The spot was always going to flood, and it usually showed the signs before the first raindrop fell.
Ahead, you'll learn how to read terrain for flood risk, how far to camp from the water, the higher-ground fallback rule, and the quick checks to run before you pitch your tent.
Table of Contents
- The Ground Already Tells You Where the Water Goes
- How Far From Water Should You Actually Camp?
- When in Doubt, Go Higher
- Look Up Before You Set Up
- Two Checks to Make Before You Leave the Driveway
- Frequently Asked Questions
- Your Stay-Dry Campsite Checklist
- Frequently Asked Questions
- Conclusion
The Ground Already Tells You Where the Water Goes
Water leaves evidence everywhere it flows. A site that has flooded before will show you the signs long before the next storm: smooth dry channels, lines of sticks and leaves, and ground that dips lower than everything around it. Leave No Trace advice on choosing a good backcountry campsite names dry creek beds and storm debris as clear warnings that water runs through an area when it rains.
Imagine a camper who rolls in at dusk, finds a flat, pretty meadow spot, and pitches fast to beat the dark. Then a storm hits at 2 a.m. and she wakes in three inches of water, because the meadow was actually a shallow bowl collecting runoff from every direction. The spot didn't betray her. It announced itself at dusk, and she just never looked.
Ground reading is a core outdoor skill, right up there with knowing how to build shelters and handle other backcountry essentials. It also flips a common assumption: flat is not the same as safe. The flattest ground in an area is often flat because moving water shaped it that way.
- Walk the whole site for two full minutes before you unpack, looking for channels, debris lines, and dips rather than just flatness.
- Treat every dry channel and debris pile as a no-camp zone no matter how dry it looks, because debris only gets there one way.
- Skip any spot that sits lower than the ground around it, even by a few inches, since low ground collects water from every uphill direction.
Dry Creek Beds and Debris Lines
The clearest flood signs are smooth, rock-lined channels, sandy troughs, and lines of sticks, leaves, or pine needles all pushed the same direction. That debris didn't blow there. Moving water carried it, and it marks the exact path the next flow will take.
Picture a bone-dry creek bed in a canyon. It looks like the flattest, most comfortable tent spot around, until an upstream storm you never see sends water down it hours later, while the sky above your camp stays clear.
- Scan for lines of sticks and pine needles, because they mark both the path and the height of past flows.
- Rule out any spot near a debris pile, even in a dry spell, because junk like that only travels by water.
- Stay wary in canyons, where the storm that floods you can break miles upstream.
Low Spots, Bowls, and Valley Floors
Low ground is the quietest flood risk of all. A shallow depression, a dished-out meadow center, or any patch lower than the ground ringing it will catch water from every uphill direction once rain starts. Valley floors fail the same way at a bigger scale, because every slope around them drains inward.
Take a gentle grassy dip, the kind you barely notice while walking. A night storm feeds runoff into it from every side, and by morning it's a pond, while a site just ten feet higher stays bone dry. The difference is a few inches of elevation, not luck.
- Stand at your candidate spot and ask where water would pool if a bucket tipped over anywhere uphill, then move above that line.
- Sight the ground from a crouch, since shallow bowls disappear when you're standing upright.
What a Well-Drained Site Actually Looks Like
A well-drained site sits on slightly raised ground with a gentle slope, so rain runs past your tent instead of pooling beneath it. The soil feels firm when you press it, and Leave No Trace guidance points to durable surfaces: bare ground, rock, or dry grass. Flat is not the goal here. Dry is.
Take two open spots side by side. One is dead flat with soft, dark soil. The other rests on a subtle rise, covered in dry grass with no debris lines anywhere near it. Most campers grab the flat one and wake up soggy, while the rise stays dry till morning.
A mild slope under your tent beats waking up in a puddle.
- Pick the subtle rise over the flattest patch, because even a slight tilt drains rain away while you sleep.
- Press the soil with your boot and walk away from anything soft, spongy, or already damp.
- Camp on durable surfaces like rock, bare ground, or dry grass, which shrug off both rain and foot traffic.
How Far From Water Should You Actually Camp?
The safe answer is at least 200 feet from the water's edge, which works out to roughly 70 big steps. That number comes from Leave No Trace guidance, and it holds for lakes, rivers, and streams alike. Close enough to enjoy the view, far enough to stay dry.
Imagine a spot right on the shore. At sunset it looks dreamy, all glassy water and soft light, so you pitch there. Then rain moves in overnight, the lake swells or the creek climbs its banks, and that prime patch is the first ground to go under. It doesn't even take a storm directly above you, since steady rain miles upstream can lift a creek while you sleep.
Those 70 steps actually do two jobs at once. The first is safety: distance buys you a buffer against rising water in the dark. The second is wildlife. Deer, raccoons, birds, and everything else nearby needs a clear path to the shore to drink, and a tent pitched at the water's edge blocks it. A shoreline site that tempts you closer is quietly asking you to give up both your flood buffer and the animals' only route to water.
- Pace out 70 big steps from the shoreline before you even start looking for flat ground, and treat that distance as your minimum search zone.
- Look for old water lines on the bank, like trapped debris or discolored grass, and add extra steps if the water has clearly been higher before.
- Check the forecast upstream, not just overhead, because rain falling miles away can raise a creek overnight.
- When a shore spot tempts you closer, remind yourself you are trading away your flood buffer and the local wildlife's path to the water.
Why 200 Feet Does Double Duty
The safety half is easy to see. Water rises overnight, and those 70 steps back usually buy you some height too, since banks slope up away from the shore. One walk gives you distance and elevation at the same time.
The wildlife half matters just as much. Shorelines are animal highways, and the heaviest traffic runs at dawn and dusk. Picture a doe reaching the lake at first light, only to find your tent parked on the one clear path down. She pushes through thick brush or goes thirsty.
- Count what a closer spot really costs: your flood buffer plus the animals' only route to a drink.
- Watch the shore at dusk before you commit, because the animal traffic alone usually settles the debate.
When in Doubt, Go Higher
When you can't tell whether a spot drains well, the fallback rule is simple: camp on higher ground. It's the standard advice in Leave No Trace campsite guidance, and it exists because water obeys one law everywhere: it goes downhill. Even a foot of extra height can be the difference between a damp tent floor and a floating sleeping bag.
The rule matters most when judgment is hardest. By dusk your eyes flatten slopes, your legs are cooked, and every low clearing starts to look friendly. A gentle rise you can barely see in that light still sheds rain all night, because gravity never gets tired. Reading ground like this is one of those wilderness survival fundamentals that feels optional until the first storm.
Imagine two candidate sites in fading light. One sits slightly uphill on open forest floor, the other in a flat clearing ringed by trees, and the clearing is closer to the trail. They look equal, so the easy one wins on effort alone. Then a storm rolls through at midnight, and by breakfast the clearing holds a shallow pond while the uphill spot is merely damp.
- Pick the designated site first, because established spots are usually chosen and built with drainage in mind.
- Choose elevated, durable ground second: a gentle rise with bare soil, rock, or dry grass beats a lush flat every time.
- Refuse the low spot no matter how tired you are, since the easiest pitch at dusk is often the wettest by morning.
- Step back 20 paces and read the slope before you commit, because gentle grades are easier to see than to feel underfoot.
Tent Pads and Durable Surfaces Beat Perfect Scenery
Designated campsites are your best bet for staying dry because they often feature elevated tent pads. These platforms keep your gear off the wet earth and act as a defense against pooling. While a meadow looks tempting, established spots are chosen for their superior drainage.
Imagine a midnight storm. A camper on a raised gravel pad stays dry, while someone in a pretty, low-lying grassy spot wakes up in a puddle. Using these sites is a smart choice that protects both you and the soil, making it one of the 7 clever outdoor hacks and tricks for a better camping trip.
- Prioritize raised platforms to stay above rising surface water.
- Pitch on rock, bare ground, or dry grass if no official site is available.
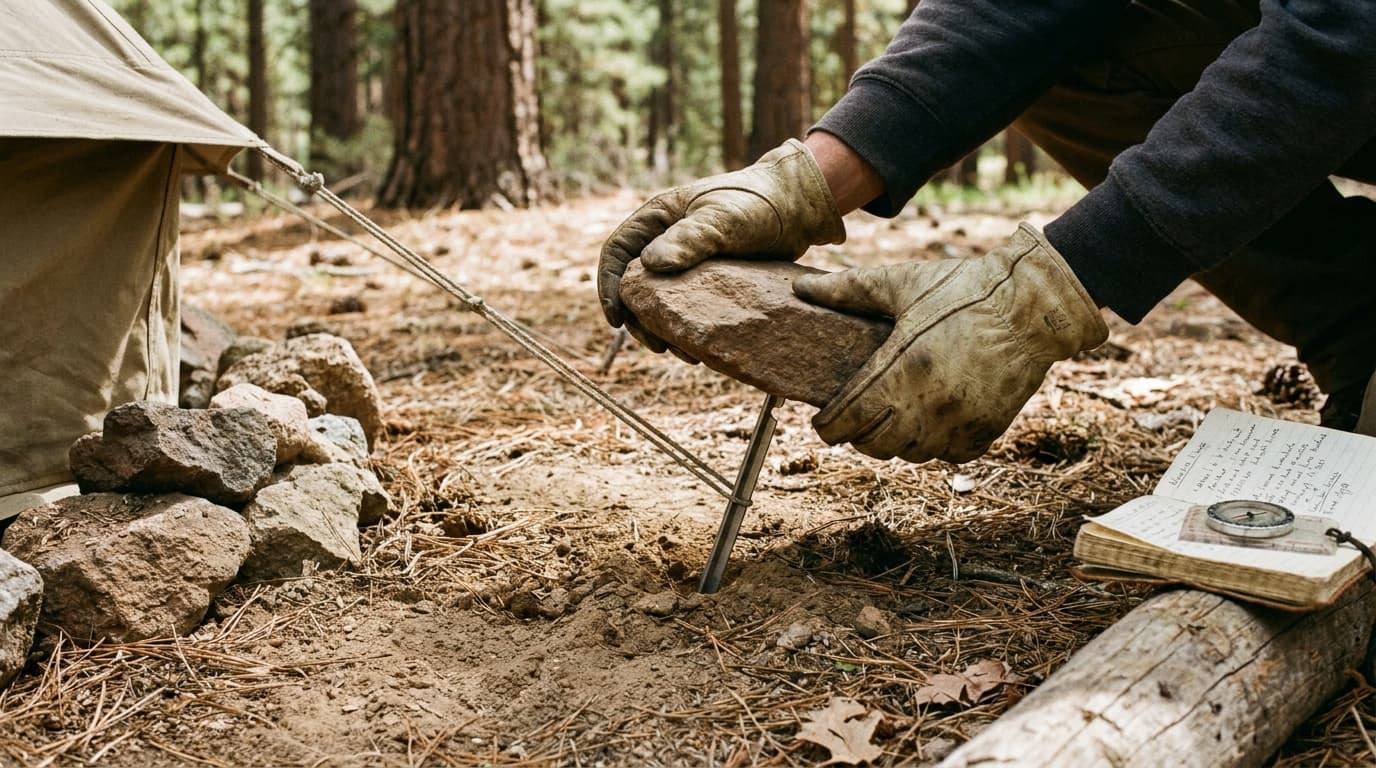
- Avoid moving rocks or clearing brush because a good campsite is found, not made.
- Scan for dead branches overhead before you unpack.
Look Up Before You Set Up
Choosing a spot that won't flood is only half the battle during a storm. The same weather systems that dump heavy rain usually bring gusty winds that can turn a forest into a hazard zone in minutes. Even if your tent is on the highest, driest ground available, you are still at risk if there is a widowmaker—a dead branch or tree—hanging directly above you. A dry site is useless if it is not also a safe one.
Imagine a hiker who spends an hour finding the perfect elevated ridge far from any rising water. They pitch their tent, feeling confident about their flood-proofing skills, but fail to notice the grey, barkless hemlock leaning just ten feet away. At midnight, a heavy gust snaps a limb the size of a person's leg, sending it straight through the rainfly. This is why wilderness survival fundamentals for beginners always emphasize looking up before you ever unpack your gear.
Safety in the backcountry is about seeing the whole picture rather than just the soil under your feet. While you are checking for dry creek beds and storm debris on the ground, your eyes should also be scanning the canopy for signs of decay. A site might look like a 7 clever outdoor hacks and tricks for a better camping trip winner because of its drainage, but if the surrounding trees are sick or brittle, you need to keep moving.
- Perform a slow, 360-degree scan of the area above your tent footprint before you start assembly.
- Identify hazards like standing dead trees, cracked trunks, or heavy limbs caught in other branches.
- Shift your tent entirely out of the potential fall zone, even if it means moving to slightly less level ground.
- Listen for creaking or snapping sounds during setup, which can indicate a tree under stress from previous storms.
- Look for peeling bark or fungus on tree trunks, as these are signs of internal rot that makes a tree prone to falling in high winds.
Two Checks to Make Before You Leave the Driveway
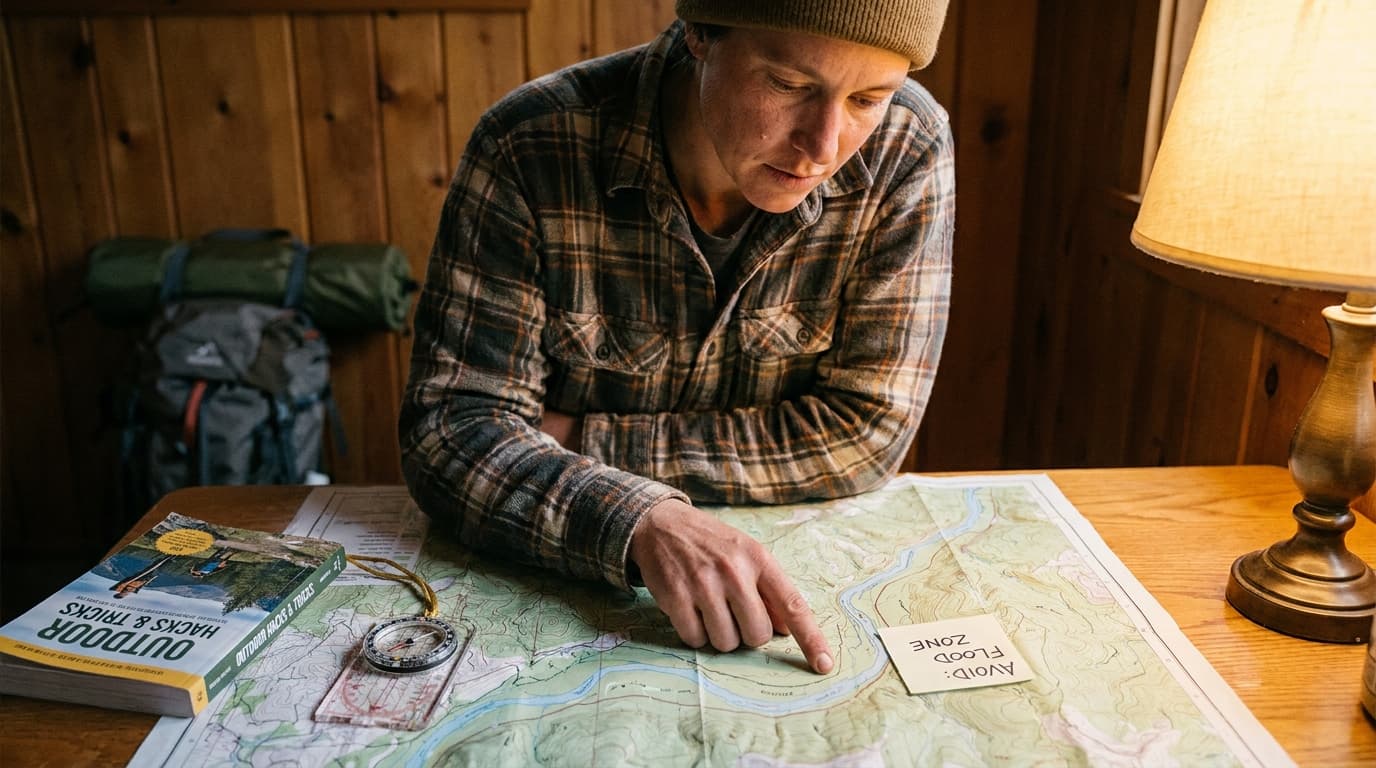
Successful flood prevention starts at your kitchen table. Before you pack the car, research the specific rules for your destination, as many areas require reservations or seasonal fees. This is also the time to check if the site offers elevated tent pads, which are built-in platforms designed to keep your gear high and dry even when the skies open up.
Timing your arrival is the second half of the battle. You want to pull into your site at least two hours before sunset so you have enough light to read the landscape. While you might want to squeeze in one last stop on the drive, getting there early ensures you get first pick of the high ground before other campers claim the best spots.
Consider a hiker who reaches the campground just as the light fails. In their rush to set up before dark, they pitch their tent in a flat, clear area that looks perfect under a headlamp. However, an early arrival that morning would have seen the faint debris lines and dry channels marking that flat spot as a natural drainage path. By the time the midnight rain starts, the latecomer is trapped in a bowl while the early bird sleeps soundly on the ridge.
Using these 7 clever outdoor hacks and tricks for a better camping trip helps, but nothing beats a good location. Daylight allows you to spot things like dry creek beds and low contours that are invisible at night. If you are unsure about a spot, the standard rule is to camp on higher ground to stay safe from rising water.
- Research reservation requirements and seasonal closures at least a week before your trip.
- Plan your driving route to ensure you arrive at camp at least two hours before the sun goes down.
- Look for sites with elevated tent pads or established durable surfaces like rock or dry grass.
- Check the local forecast one last time before you lose cell service to anticipate heavy rain.
Frequently Asked Questions
How far should I camp from a river or lake? You should set up your tent at least 200 feet, or about 70 big steps, away from the water's edge. This distance protects you from sudden water level rises and follows Leave No Trace guidance to ensure local wildlife can still reach the shore without being spooked by your camp.
Is a dry creek bed safe if there is no rain in the forecast? No, dry creek beds and areas with storm debris are active flood zones that can fill rapidly even if it is only raining miles away. Instead of risking a wash-out, use 7 clever outdoor hacks and tricks for a better camping trip to identify well-drained, durable surfaces like rock, bare ground, or dry grass.
Imagine a hiker who ignores faint debris lines because the sky is clear, only to have a flash flood from a distant mountain storm sweep through their camp at 2 a.m. In this scenario, they must immediately abandon the tent and move to higher ground, as survival skills and emergency shelter building for beginners save lives when gear is lost to rising water. Safety is always the priority over saving equipment.
- Maintain a 200-foot buffer from any water's edge to stay safe from swelling banks and rising tides.
- Identify storm debris and dry channels as warning signs that a site is a natural drainage path.
- Select naturally high ground or elevated tent pads rather than digging trenches, which causes permanent damage to the soil.
- Move to higher ground immediately if you hear a roar or see water beginning to pool around your tent at night.
Your Stay-Dry Campsite Checklist
Stop treating site selection like a memory test. Instead, make it a two-minute walk. A quick lap around the perimeter is the best way to learn how to pick a campsite that won't flood overnight. You want ground that is slightly elevated and sloped, ensuring rain moves past you rather than pooling under your tent.
Imagine finding a flat clearing at dusk. It looks perfect, but your walk reveals a pile of dried leaves caught against a log. This is a clear sign that water flows through here. By catching this, you can use 7 clever outdoor hacks and tricks for a better camping trip to move to a safer spot on a nearby rocky bench.
- Pace out 70 big steps from the water first to anchor your site in a safe zone.
- Scan the dirt for dry channels or debris lines that signal a natural flood path.
- Look up for standing dead trees or heavy branches that could fall during a storm.
- Stick to durable surfaces like rock or dry grass to keep your tent floor dry.
- Move to higher ground whenever you feel unsure about how well a spot drains.
Frequently Asked Questions
Is it ever safe to camp in a dry creek bed?
It is never a safe bet to camp in a dry creek bed. Even if the sky is perfectly clear right above you, a storm miles away can send a flash flood down that channel without warning. These beds are essentially natural drainage pipes for the landscape, and they can fill with water in a matter of seconds.
You can usually tell a spot is prone to this if you see piles of branches or smoothed out rocks where there is currently no water. Sea to Summit notes that these signs indicate water will likely flow through there again, meaning you should always look for higher ground.
How far from a river or lake should I pitch my tent?
The gold standard is to stay at least 200 feet away from any water source. A quick way to measure this is by taking 70 big steps from the shore. This distance keeps your gear dry if the water level rises, but it also serves a bigger purpose for the environment.
By staying back, you leave enough space for local animals to reach the water to drink without feeling threatened by your camp. It also helps prevent the soil near the bank from eroding or getting packed down too hard, which protects the water quality for everyone else.
What should I do if my campsite starts flooding in the middle of the night?
If you wake up to water moving under your tent, the most important thing is to move to higher ground immediately. Don't waste time trying to pack your bag perfectly. Grab your shoes, your light, and your car keys or emergency kit, then get to a safer spot.
Since the standard rule for flood safety is to camp on higher ground when you aren't sure about a spot, you should have a backup location in mind before you go to sleep. You can always come back for the rest of your gear once the sun is up and you are sure you are safe.
Can I dig a trench around my tent to drain water away?
While it used to be common advice, you should never dig a trench around your tent. It causes lasting damage to the soil and can lead to serious erosion long after you leave. This goes against modern outdoor ethics because a good campsite should be found and not made.
A better approach is to find a spot that is naturally well-drained or use elevated tent pads which are designed to keep you dry without harming the environment. If you find yourself in a puddle, the best move is to relocate your tent to a more durable surface like rock or dry grass rather than digging into the earth.
Conclusion
Picking a spot that stays dry is less about luck and more about reading the story the ground is already telling you. When you look for those telltale debris lines, dry sandy channels, or subtle dips in a meadow, you are seeing exactly where the water will flow when the clouds open up. It is about realizing that a perfectly flat spot might actually be a bowl waiting to fill.
The bottom line is that safety comes from a few simple habits. Pacing out those 70 steps to keep your 200 foot distance from the water provides the buffer you need for peace of mind. Also, remember to look up for dead branches before you commit to the ground. These small checks take only a few minutes but they change your whole experience.
On your next trip, make that two minute site walk your first priority before you pull any gear out of the bag. A great campsite is something you find by being observant, not something you create by luck. Stay on the high ground and you will wake up dry every time.
Send it to someone who should read it next.
About the author

WilderReady Editorial Team
Research, Writing & Editorial Review
Every WilderReady guide is researched, written, and fact-checked in-house against trusted references such as the American Red Cross, the National Park Service, and the CDC before it goes live. We publish under this shared byline instead of invented personas, so you always know who stands behind the guidance you are reading.
View all articles