When a Hike Goes Wrong: How to Handle Broken Bones in the Wild
One minute you are soaking in the views, and the next, a misplaced step results in a sickening crunch. Backcountry accidents happen to even the most seasoned hikers, but a...
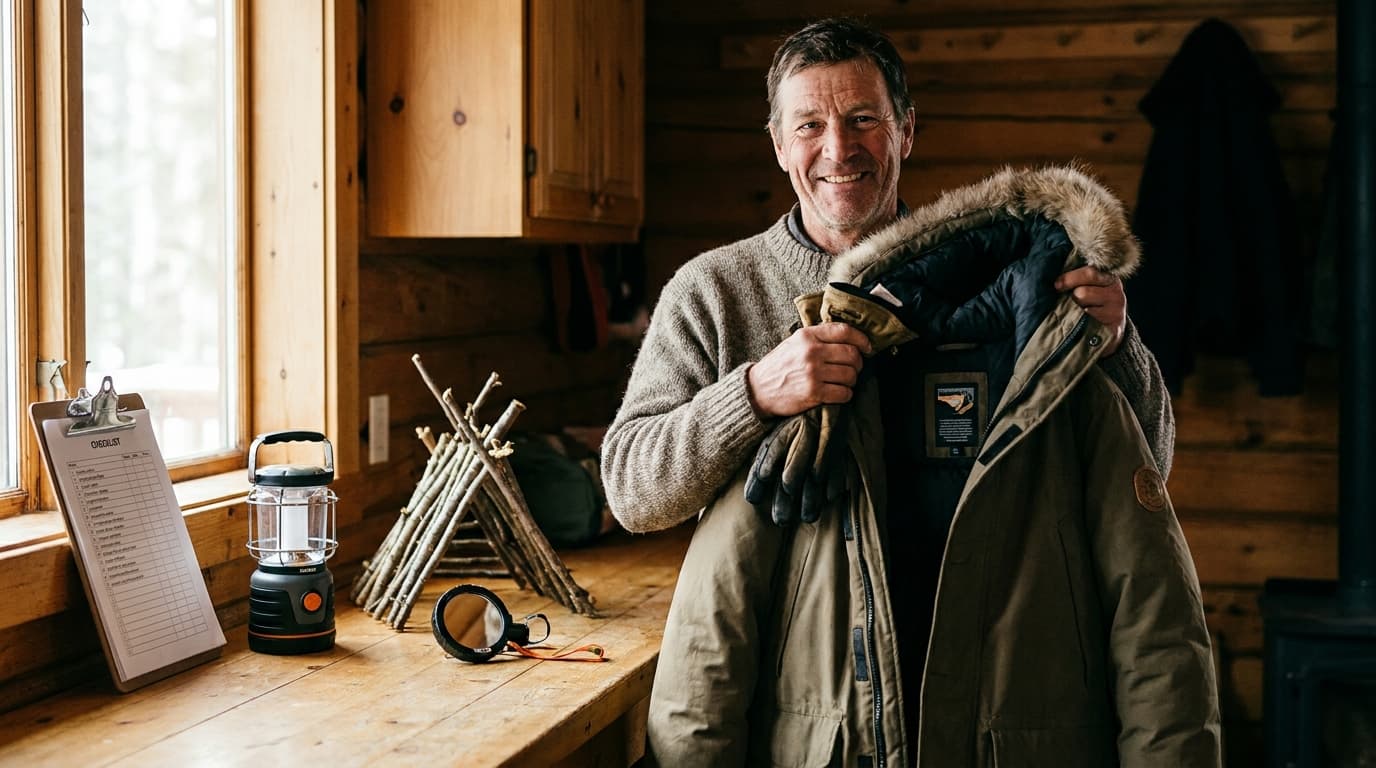
Maya Bennett
Preparedness Coach & Survival Systems Editor

When a Hike Goes Wrong: How to Handle Broken Bones in the Wild
One minute you are soaking in the views, and the next, a misplaced step results in a sickening crunch. Backcountry accidents happen to even the most seasoned hikers, but a fracture does not have to mean the end of the line. Knowing the basics of wilderness first aid for broken bones is about more than just having a fancy kit. It is about staying calm and using your brain when things go sideways.
We will show you how to splint a leg in the wild using the gear you are already carrying, like trekking poles or a sleeping pad. You will learn how to check for circulation and when to use self-rescue techniques versus calling for help. Whether you are hiking with an injury or prepping for an emergency wilderness evacuation, these skills help ensure you get home safely.
This article walks through assessing the damage without panicking and building a sandwich splint that actually stays put. It is the kind of practical knowledge you hope you never need but will be glad you have if the trail takes a turn for the worse.
First Things First: Assessing the Damage Without Panicking
The moment a bone snaps or an ankle twists on a remote trail, your adrenaline spikes. It is easy to rush, but that is how mistakes happen. Instead, try the Stop, Breathe, Think method. Sit down and take a minute to calm your heart rate before you touch the injury. You need a clear head to figure out if you are dealing with a nasty sprain or a true fracture. While a sprain involves stretched ligaments, a fracture often comes with an obvious deformity, a grating sound, or the total inability to move the limb.
Your top priority is not actually the bone itself. It is checking for a pulse below the injury. If blood is not reaching the hand or foot, you have a true emergency on your hands. Think of it this way: a broken bone can wait a few hours, but a limb without blood flow cannot. This is why medical experts often say that building a good splint takes time and thought. You are not just tying sticks to a leg. You are creating a stable environment for healing while making sure you do not make the injury worse by cutting off necessary circulation.
Recent data shows that a huge number of outdoor injuries involve these kinds of limb issues. Whether you have taken a full sixteen-hour Wilderness First Aid course or just a three-hour crash course, the basics remain the same. You have to stay calm enough to look at the injury objectively. Is the skin a weird color? Is the limb sitting at an angle that looks impossible? These are the clues that tell you how to proceed. If you panic, you might miss the small details that matter most for a safe evacuation.
Checking blood flow is simpler than it sounds. One of the best ways to do this is the two-second rule for capillary refill. Press down on a fingernail or a patch of skin near the injury until it turns white, then let go. In a healthy person, the color should rush back within about two seconds. This is a primary way to check circulation in the field. If it takes longer than that, the blood is not moving like it should.
But wait, there is a catch. Cold weather can trick your assessment. Freezing mountain air naturally slows down blood flow to your fingers and toes, which might make a healthy person look like they have a circulation problem. If you are in the snow, try to warm the limb slightly before you test it. If the skin stays pale, blue, or cold even after warming, you should be seriously concerned about the blood flow to that limb.
The CSM protocol is your best friend in the backcountry. It stands for Circulation, Sensation, and Motion. Start by finding a distal pulse, like the one on the top of the foot or the wrist. Next, check for sensation. Ask the person if they feel any tingling or numbness. These pins and needles feelings often point to nerve issues or a splint that is too tight.
Finally, check for motion, though you should skip this if it causes extreme pain. Here is the most important part: do not just check once. You should re-check CSM every single hour during an evacuation. Swelling is a slow process. A splint that fit perfectly at noon might be way too tight by 1:00 PM as the leg continues to puff up. Continuous monitoring is actually more important than the initial application of the splint itself. If the person loses sensation or their pulse weakens, you need to loosen the ties immediately.
Key insights:
- Continuous monitoring of CSM is more important than the initial splint application.
- Cold weather can cause false readings during capillary refill tests by naturally slowing blood flow.
- Checking distal pulses every hour is necessary to account for internal swelling during evacuation.
The 2-Second Rule: Checking Capillary Refill
Once the splint is on, you need to make sure it is not too tight. Press a fingernail or skin below the injury until it turns white, then let go. The pink color should return in about two seconds. If it stays pale, blood is not flowing well and you must loosen the ties immediately.
But watch out because cold weather can trick you. Chilly air slows blood flow naturally, so a slow refill might just be the temperature. Check the uninjured side first to see what normal looks like in that environment. This gives you a baseline so you do not panic or loosen a good splint for no reason.
Monitoring is a constant job because swelling often gets worse over time. Check for blue skin or tingling every hour. If you see these signs, loosen the straps right away to keep the limb safe while you wait for rescue.
Key insights:
- Always compare the injured limb to the healthy one to account for cold temperatures.
- Check circulation, sensation, and mobility every hour as swelling increases.
- Loosen the splint immediately if you notice blue skin or new numbness.
The CSM Checklist: Circulation, Sensation, and Motion
You have built the splint, but your job is far from over. In fact, staying on top of Circulation, Sensation, and Motion (CSM) is often more important than the initial wrap. Why? Because injuries swell, especially when you are hiking with an injury. If a splint becomes too tight, it acts like a tourniquet, and you risk causing nerve damage. Start by checking for a distal pulse at the wrist or ankle and look for a healthy capillary refill. You want to see color return to the skin within about two seconds after you release pressure.
Next, check in with your patient. Are they feeling any new tingling or numbness? This sensation check is your early warning system for a pinched nerve. If they can no longer wiggle their fingers or toes, the motion is compromised. Sierra Rescue International notes that style points go to splints that stay secure and look good throughout an evacuation. This is not just about being neat; it is about durability. Since wilderness rescues take time, re-check these three markers every hour to make sure the splint has not shifted or tightened as the limb swells.
Key insights:
- Continuous monitoring of CSM is actually more critical than how the splint was first applied.
- A healthy capillary refill means skin color returns within two seconds of being pressed.
- Re-checking every hour is necessary because swelling can turn a helpful splint into a dangerous restriction.
Building Your Support: The Art of the Improvised Splint
Building a solid splint in the wild is basically high-stakes arts and crafts. When you are miles from the nearest road, you cannot just slap some tape on a limb and hope for the best. The main goal is to keep the joints above and below the break from moving at all. If the shin is the problem, the ankle and the knee both need to stay still. This stops the bone ends from wiggling around, which is just as painful as it sounds. Most people learn these skills in a 16-hour wilderness first aid course, but the core idea is simple: keep everything steady.
Here is a helpful tip from the pros at Sierra Rescue International: style actually matters. They often say that a pretty splint is a functional splint. This is not about winning a beauty contest in the woods. It just means that a tidy, well-organized setup is much less likely to fall apart or get loose while you are being moved. If your splint looks like a messy pile of sticks and string, it probably will not survive a bumpy ride out to safety.
The real trick is finding a balance between being firm and being soft. You want the splint to be stiff enough to stop all movement, but you also need plenty of padding to protect the skin. Without enough cushion, the hard parts of the splint can cause painful sores or even nerve issues over time. Think of it like building a little protective nest for the injury. It takes a bit of patience to get it right, but rushing this part is never a good idea when you are dealing with a potential break.
The Sandwich Method is a classic way to build a stable support using three layers. Think of the padding as the bread. You want soft things like extra shirts, a fleece, or a puffy jacket right against the skin to soak up moisture and keep things comfy. Then comes the meat of the sandwich: the rigid parts. For a leg, these supports should be as long as possible, ideally reaching from the hip all the way to the toe on the outside. Finally, wrap it all up with duct tape, straps, or paracord. You want it firm but not crushing.
If you have a foam sleeping pad or a Therm-a-Rest, you basically have a secret medical weapon in your pack. This is called the Jelly Roll technique. You wrap the pad tightly around the limb to create a stiff, padded sleeve. It is great because it provides even pressure all the way around the injury. You can even tuck a tent pole or a sturdy branch into the folds of the pad to make it even stronger. It is a smart way to use your gear for more than just a good night of sleep.
Once the splint is on, you still have to keep a close eye on it. You need to check the circulation every hour to make sure things are not getting too tight. A simple way to do this is the capillary refill test. Press on a fingernail or a bit of skin until it turns white, then let go. The color should come back within two seconds. If it takes longer, the splint is too tight and needs a quick adjustment. Since injuries tend to swell, a perfect fit can become a tight one pretty fast in the backcountry.
Key insights:
- Always immobilize the joints above and below a fracture to prevent the bone ends from shifting.
- A well-organized and tidy splint is more likely to remain secure during a long and difficult evacuation.
- Use a foam sleeping pad to create a Jelly Roll splint for uniform pressure and excellent support.
- Monitor circulation every hour by checking that skin color returns within two seconds after pressure is released.
The Sandwich Method: Padding, Rigidity, and Fastening
Outdoor injuries often involve broken limbs, and when you are miles from help, a flimsy fix will not cut it. As Sierra Rescue says, building a good splint takes time and thought. The Sandwich Method uses three distinct layers to create the stable support needed for a safe evacuation.
First, use clothing or extra base layers as padding against the skin. Think of this as the bread that keeps things comfy and prevents more pain. Next, add your rigid components like trekking poles or sturdy branches, making sure that for a leg injury, these supports extend all the way from the hip to the toe for maximum stability. Finally, secure the entire structure with straps, duct tape, or paracord.
The real secret? It is not just about the build. It is about the joints. You must immobilize the joints above and below the injury to keep the bone still. Once it is on, check the capillary refill often. If color does not return to the skin within two seconds, the splint is too tight. Keep checking because swelling changes how the materials fit over time.
Key insights:
- Immobilize the joints above and below a bone injury to ensure total stability.
- A healthy capillary refill means color returns to the skin within two seconds of releasing pressure.
- Effective leg splints should be as long as possible, ideally extending from the hip to the toe.
The Jelly Roll: Using Your Sleeping Pad
Your sleeping pad is more than a bed. In a crisis, a foam pad or Therm-a-Rest is a secret medical weapon. The Jelly Roll technique turns this gear into a high-pressure support system. By wrapping the pad snugly around a limb, you create uniform compression that keeps the bone still while you plan your exit.
For extra strength, add rigid items like trekking poles into the roll. For a leg, these should run from the hip to the toe to lock the joints above and below the break. A good splint takes time to build, but it must stay secure during a rough evacuation.
Finally, monitor circulation constantly. Press the skin near the injury and color should return within two seconds. If it is slower, the wrap is too tight. Check this every hour, because swelling can quickly turn a good splint into a dangerous tourniquet.
Key insights:
- Immobilize the joints above and below the bone injury for stability.
- Check capillary refill hourly to ensure the splint is not cutting off blood flow.
- Use trekking poles as internal rigid components for maximum strength.
Gear Hacks: Turning Your Pack into a Pharmacy
Think about your pack for a second. It isn't just a bag of clothes; it's a mobile trauma center. In the backcountry, you can't carry every medical supply, so your gear has to pull double duty. This is where "River Guide Ingenuity" comes in. It's the art of seeing a PFD not just as a life jacket, but as a rigid chest stabilizer, or using a dry bag as a bulky cushion for a limb. Since a huge chunk of wilderness injuries involve broken bones or severe sprains, knowing how to turn a trekking pole into a structural "bone" for a splint is a vital skill for any hiker.
When sizing a leg splint, length is your best friend. For a fracture to stay still, you have to immobilize the joints above and below the break. This means a proper leg splint should ideally run from the hip all the way down to the toe on the outside of the limb. Using a trekking pole or even a paddle provides that necessary rigidity. But here’s the thing: you can't just tie it on and forget it. You have to monitor circulation, sensation, and mobility (CSM) constantly. If you press on a toe and the color takes longer than two seconds to return, you’ve likely cut off the blood flow.
Building a solid splint takes more than just duct tape; it takes deliberate thought. Professionals look for "style points," which really just means the splint is durable enough to survive a bumpy evacuation without falling apart. Make sure the materials don't rub against or interfere with the "good" leg, or you'll end up with two injured limbs. Whether you've taken a quick three-hour medicine course or a full sixteen-hour certification, the goal is the same: keep the injury stable and keep the blood moving. Re-check those pulses every hour, because as the limb swells, that perfect splint can quickly become too tight.
Key insights:
- Immobilize the joints above and below a bone injury to ensure the splint actually works.
- A healthy capillary refill should see color return to the skin within about 2 seconds after pressure.
- Continuous monitoring of circulation and sensation is more important than the initial application of the splint.
- Effective leg splints should extend from the hip to the toe to provide maximum stability during movement.
Length Matters: Sizing Your Splint Correctly
How long should your splint actually be? For a leg injury, you want rigid supports reaching from the hip all the way down to the toe. It might feel like overkill, but immobilizing the joints both above and below the break is the only way to keep bone ends from shifting while you move.
But do not forget about the good leg. A splint that sticks out too far makes moving nearly impossible for the patient. This is where River Guide Ingenuity comes in. Guides often use paddles because they are stiff and long enough to provide coverage without being too bulky or awkward.
Sierra Rescue notes that style points matter because a tidy splint stays together during a rough evacuation. Just keep an eye on circulation once it is finished. If the skin color does not return within two seconds after a squeeze, you have tied it too tight.
Key insights:
- Immobilize the joints above and below the injury to prevent bone movement.
- Use long, rigid items like paddles to provide hip-to-toe support.
- Check capillary refill regularly to ensure the splint isn't cutting off blood flow.
The Hard Choice: Self-Rescue or Waiting for Help?
You have taken a hard fall and the adrenaline is starting to fade. Now comes the heavy question: do you try to limp back to the car or stay put and wait for help? It is a high-stakes choice that depends entirely on the severity of the injury and your location. If you can still move your toes and feel sensation, self-rescue might be on the table. But if you see bone or the limb looks deformed, trying to hike out could turn a bad injury into a permanent disability. You have to be honest with yourself about the terrain ahead and your physical limits.
Before you make a move, you need to check your circulation. Press down on your nail bed or skin and watch how fast the color returns. A healthy body sends that blood back in about 2 seconds. If it takes longer or the area stays blue and cold, your circulation is compromised. In that case, hitting the SOS button on your satellite messenger isn't just an option, it is a necessity. Rescue takes time, so the sooner you signal, the better your chances of saving the limb. Think of it this way: a helicopter ride is expensive, but a lost leg is a much higher price to pay.
If you decide to move, preparation is everything. You are looking at a long, slow journey where every step counts. This is where your gear does double duty. Use your sleeping pad or extra clothes as padding in what experts call a sandwich splint. You want rigid support that is as long as possible. For a leg, this ideally goes from your hip to your toe to keep everything still. Remember that building a good splint takes real thought and time. It shouldn't just look okay at the start but needs to stay secure for hours of hobbling without falling apart.
Walking on a broken or badly sprained limb requires a buddy assist or a sturdy improvised crutch. If you have trekking poles, they are your best friends right now. You can also use a long, thick branch, but make sure to pad the top with a spare jacket so you don't bruise your armpit. Keep a constant eye on your swelling too. You should re-check your circulation and sensation every hour because a splint that fit fine at noon might become a tourniquet by two o'clock as the injury swells up.
Things get even trickier if your four-legged trail buddy is the one who is hurt. Dogs and adventure cats can't tell you how much it hurts, so you have to watch their breathing and gums for signs of shock. For smaller pets, you might need to empty your pack and carry them out like a backpack. For larger dogs, you can sometimes fashion a stretcher using two long poles and a couple of zipped-up jackets. It is a grueling process, but they rely on you to be the leader and make the right call for their safety.
Key insights:
- Always check the joints above and below a bone injury to ensure the entire area is immobilized.
- Re-check the 2-second capillary refill test every hour during an evacuation to account for swelling.
- Improvisation is a core skill because you will rarely have professional medical splints in the backcountry.
- A 16-hour Wilderness First Aid course provides the best foundation for making these life-changing decisions.
Hiking with an Injury: Tips for the Trail
Imagine you are miles from the car when a misstep turns a fun day into a survival scenario. If you have to keep moving, a buddy assist or a trekking pole used as a crutch helps, but the setup is key. You must immobilize the injury by securing the joints above and below a bone break. As the experts say, a good splint takes time and thought to ensure it does not fall apart during the hike out.
While moving, managing swelling is a constant battle. This is where monitoring circulation and sensation becomes more vital than the splint itself. Check skin color and temperature often. A healthy capillary refill means color returns within two seconds of being pressed. If it takes longer, the wrap is likely too tight. Re-check this every hour because as you walk, swelling changes how everything fits.
What if your dog or adventure cat is the one who is hurt? They cannot explain the pain, so you have to be their advocate. Use the same immobilization rules, but be ready to carry them if the trail is rough. Using gear like sleeping pads for padding creates a sandwich of support that keeps them stable. It is about making do with what you have to get everyone home safely.
Key insights:
- Check circulation by pressing the skin; color should return within two seconds.
- Immobilize the joints above and below a bone injury to prevent further damage.
- Re-assess the tightness of wraps every hour to account for increased swelling during movement.
- Use trekking poles or sleeping pads as improvised rigid components for trail-side splints.
Frequently Asked Questions
Conclusion
Dealing with a fracture miles from the nearest trailhead is scary, but it does not have to be a total disaster. When you know how to check for circulation and turn a sleeping pad into a sturdy support, you are moving from panic to a real plan. The bottom line is that your brain and your backpack are your most important tools for wilderness first aid for broken bones.
What matters most is staying calm enough to use what you have on hand. Your next move might be looking into a weekend wilderness first aid class to get some hands-on practice. Whether you are out there with human friends or your favorite adventure cat, having these skills in your back pocket makes every trip a lot safer.
Accidents are just part of the risk we take for a great view, but they do not have to end the story. Keep your head on straight, trust your splint, and focus on getting back to the car one step at a time.
Send it to someone who should read it next.
About the author

Maya Bennett
Preparedness Coach & Survival Systems Editor
Builds practical checklists, kits, and preparedness routines that help beginners turn emergency planning into repeatable action.
View all articles