Survival Scenarios: How to Survive Dehydration in the Wild, Purify Water, and Handle Winter Storms or Floods
Surviving a crisis starts with knowing how to handle Survival Scenarios: how to survive dehydration in the wild, beginner wilderness first aid guide, best survival gear for flood emergencies, emergency...
Survival Scenarios: How to Survive Dehydration in the Wild, Purify Water, and Handle Winter Storms or Floods
Surviving a crisis starts with knowing how to handle Survival Scenarios: how to survive dehydration in the wild, beginner wilderness first aid guide, best survival gear for flood emergencies, emergency checklist for sudden winter storms, how to purify water using natural materials.
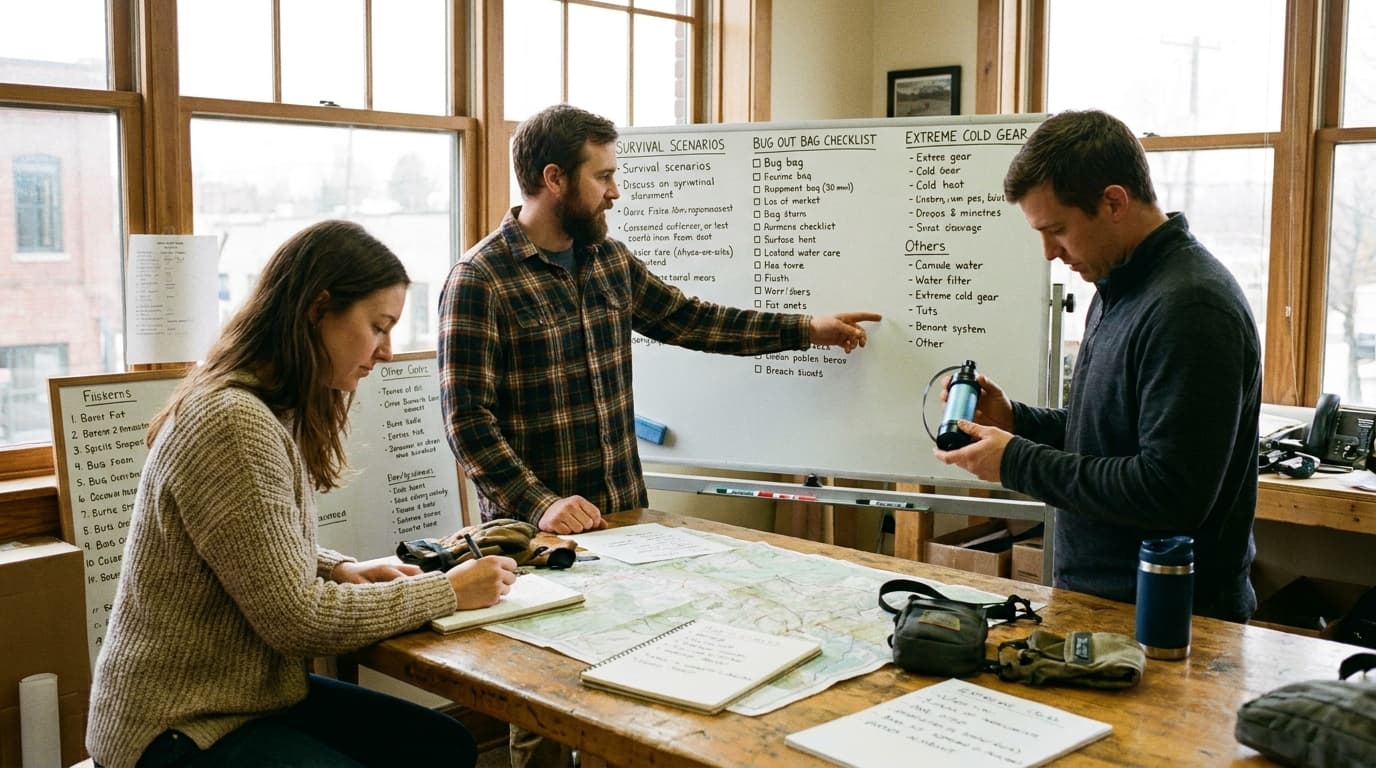
With billion-dollar climate disasters hitting record highs, being part of the 50% of adults who aren't prepared is a serious risk. You don't need a bunker or expensive gadgets, just the right skills and reliable tools to keep your family safe.
We'll show you how to find water, treat injuries, and pick gear that actually works when the power goes out or the water rises.
Survival depends on preparation, yet FEMA data indicates 50% of adults aren't ready for disasters. As climate events rise, basic skills and clean water matter more than gadgets.
Imagine a winter storm suddenly cuts the power. Instead of panic, you grab your favorite cat and use the camping headlamp and water filter you already own to stay safe.
Key insights:
Try purifying water with filters or boiling to stay safe.
Look for natural fiber layers to manage body heat.
Keep a first aid kit ready for sudden injuries.
How to Purify Water Using Natural Materials and Survive Dehydration
If your water bottle runs dry while you're out in the wild, your first priority is finding a source that won't make you sick. You can't just gulp down water from a stagnant pond or a muddy stream because it's likely packed with bacteria. Instead, you need to use natural materials to clear out the sediment before you even think about boiling it for safety.
Imagine you're hiking a new trail and realize you've lost the path just as your last drop of water disappears. You find a slow-moving, murky creek, but you don't have a portable filter in your pack. In this spot, you would need to build a quick charcoal-and-sand filter or set up a solar still to collect clean moisture from the earth itself.
To stay safe, watch for early signs of dehydration like a sticky mouth or dark urine before your energy levels crash. If there is no visible water, try digging in a dry creek bed at the outside of a bend where water often hides just below the surface. When you finally get some water, sip it slowly rather than chugging it so your body can actually use the fluids.
It is a common problem, as FEMA data indicates that about half of adults aren't ready for emergencies with the right supplies. Expert Fabian Raemy points out that water purification is one of the four essential categories for any beginner. Knowing these DIY tricks can bridge the gap when your gear isn't enough.
Key insights:
Dig in the sand at the outside of a dry creek bend to find seep water.
Layer charcoal, sand, and pebbles in a container to filter out mud.
Create a solar still by trapping ground moisture under a plastic sheet.
Sip water slowly to maximize absorption and prevent stomach issues.
Boil all naturally filtered water to kill invisible pathogens.
How to Survive Dehydration in the Wild Without Getting Sick
Surviving dehydration is about spotting warning signs and using what you find wisely. Your body signals trouble with dark urine or a sticky mouth early on. This knowledge is vital, especially since FEMA data shows 50% of adults lack full disaster preparedness.
Imagine you are on a trail with an empty bottle. Find a dry creek bed and look for a bend. Dig a hole on the outside of that curve. Often, groundwater will seep into the bottom, giving you a hidden supply when things look parched.
Key insights:
Sip water slowly to help your body absorb it efficiently.
Search for green plants or damp soil in low-lying areas.
Dig small wells in sandy washes and let the water settle.
Use purification tabs on any wild water to avoid illness.
A Beginner Wilderness First Aid Guide for Unexpected Injuries
When you are miles from a hospital and help is hours away, your first priority is stabilization. You need to stop bleeding, clean the wound, and prevent infection before things get worse. Recent data shows that about 50% of U.S. adults do not meet basic disaster preparedness thresholds, which is a scary gap when help cannot reach you.
It is not just about having any kit but about having the right one. Following the CSA Z1220-17 standard helps you pick a kit that actually works for your situation. Quality beginner kits usually cost between $200 and $400, but they stay reliable when budget versions priced under $150 often fail.
Imagine you are evacuating during a heavy storm and a friend trips, catching their leg on a jagged, fallen branch. The cut is deep, blood is soaking their clothes, and the rain makes everything slippery. In this moment, you do not need a fancy tactical gadget. You need a way to stop that bleeding fast so you can keep moving.
This is where modern medical tech helps. Expert Fabian Raemy says basic first aid is a core pillar of survival. Using WoundSeal, a powder that stops bleeding on contact, can turn a scary emergency into a manageable injury while you wait for the weather to clear.
Key insights:
Carry WoundSeal to stop bleeding from deep cuts or nosebleeds instantly.
Assemble your own kit to save up to 40% in costs compared to pre-made versions.
Check that your supplies meet CSA Z1220-17 standards for the right size and type of kit.
Wear layers of light, natural fibers and a waterproof outer shell to stay warm while treating injuries.
Picking the Best Survival Gear for Flood Emergencies
When floodwaters rise, the best gear is whatever keeps you dry and moving without weighing you down. You need tools that handle total immersion and provide power when the grid fails. Recent data from NOAA shows that billion-dollar weather disasters are hitting more often, so your gear must be reliable. Think of your survival bag like a sturdy cat carrier; it needs to be light, durable, and ready to go at a moment's notice. High-quality kits usually cost between $200 and $400, which is a better investment than budget versions that often fail when things get messy.
Imagine a sudden flash flood hits your home in the middle of the night. You have ten minutes to leave before the roads are blocked, so you grab your cat and a 15-pound backpack. In this moment, you do not want a heavy bag filled with useless gadgets. You need your gear in high-quality dry bags and a reliable 1200-lumen lantern so you can see the path ahead through the pouring rain. Having a portable power station also ensures you can keep your phone charged to check for local evacuation updates and stay connected with family.
Here is the thing: about half of us are not actually ready for a disaster. Taking a few simple steps now can make a huge difference if you ever have to leave your home in a hurry. Focus on portability and power to stay safe.
Key insights:
Pack your essentials in waterproof dry bags to keep everything functional in heavy rain.
Use a 1200-lumen lantern to provide enough light for safe movement at night.
Carry a portable power station to maintain communication when the electrical grid fails.
Stick to a 15-pound weight limit for your bag so you can stay mobile while walking.
Build your own kit to save up to 40 percent on costs compared to buying pre-made systems.
Your Emergency Checklist for Sudden Winter Storms
Staying warm and keeping your electronics alive when the grid fails during a freeze comes down to insulation and battery chemistry. You need to trap body heat using specific materials and use power sources that do not quit when the temperature drops. Since FEMA data shows that half of all adults lack a full disaster plan, focusing on these core essentials is the best way to stay safe.
Imagine a massive snowstorm that knocks out your power for three days while the thermometer stays below zero. Your house gets cold fast and your standard batteries are starting to die because of the chill. If you have the right gear, you are not just shivering under a pile of blankets. You are wearing natural fiber layers and using a Mylar sheet to bounce your own warmth back at you. While others struggle with dim flashlights, your lithium-powered lantern stays bright because those batteries do not give up in the cold.
It is also smart to check your existing outdoor gear before buying anything new. People who camp or hike often have high-quality sleeping bags and headlamps that work better than cheap, pre-made emergency kits. Focusing on quality over quantity helps you prepare for the 27 billion-dollar disasters recorded by NOAA in 2025 and avoids the tactical gadgets that look cool but break when you actually need them.
Key insights:
Layer natural fibers like wool or silk under a windbreaker to stay warm and dry.
Wrap yourself in a Mylar blanket to reflect heat back to your body during a freeze.
Switch to lithium batteries for your emergency lights because they do not drain as fast in the cold.
Keep a portable power station charged so you can keep your phone alive for emergency updates.
Skip the flashy survival gadgets and stick to basics like warmth, light, and water.
The Truth About Survival Kits: Quality Over Tactical Gadgets
Deciding between a pre-made kit or building your own comes down to your budget and how much time you have. Think of it like prepping for a new pet where you want the basics ready before the chaos starts. Buying a kit from a trusted expert is the fastest way to get prepared, but you pay for that convenience. If you have the patience to shop around, building your own kit can save you 30% to 40% in total costs while ensuring every piece of gear is top-quality.
It also helps to look at what you already own because high-quality hiking or camping gear is often better than entry-level emergency products. Recent statistics show that about half of U.S. adults still lack full disaster supplies, so starting with your existing headlamps and sleeping bags is a smart way to bridge the gap without overspending. Focusing on quality over quantity ensures that your tools actually work when you need them most.
Imagine you are stuck in a sudden winter storm and need to clear some small branches for an emergency shelter. You pull out a $50 multi-tool that promised to do fifty different things. The blade snaps the moment you apply pressure. Now you are left in the cold with a broken tool. This happens because the gadget was built for a gift shop rather than a real emergency. Spending a bit more on a proven brand prevents these dangerous failures.
Key insights:
Try repurposing your existing camping gear like headlamps and water filters to save money.
Spend between $200 and $400 if you choose to buy a pre-made kit to ensure the items are reliable.
Avoid flashy tactical gadgets that prioritize a cool look over actual outdoor performance.
Focus on the four core categories which are water purification, first aid, shelter, and fire tools.
Look for professional medical items like WoundSeal powder to handle serious bleeding issues fast.
Final Thoughts: Starting Your Preparedness Journey Today
Starting your preparedness journey is simpler than most people think. You just need to focus on four core categories: water purification, first aid, 72-hour kits, and shelter tools. Recent data shows that about 50% of U.S. adults aren't fully prepared for a disaster, but you can change that today without spending a fortune.
Imagine you're packing for a weekend hike. You likely already have a headlamp, a warm sleeping bag, and a portable water filter. These items are often higher quality than the cheap, pre-made emergency kits found online. Using your existing outdoor gear ensures you have tools you already trust and know how to operate.
Key insights:
Audit your current camping gear to see what can double as emergency supplies.
Focus on core categories like water and first aid instead of tactical gadgets.
Keep your evacuation bag lightweight, ideally under 15 pounds.
DIY your kit to save money while ensuring much better quality.
Frequently Asked Questions
You will want to focus on the events most likely to hit your home, like sudden winter storms, floods, or extended power outages. Most people think they need to prepare for a total collapse, but the reality is usually much more local. In 2025, NOAA recorded 27 billion-dollar weather disasters that impacted over 52 million people, showing just how common these high-impact events have become.
The best way to start is by focusing on the first 72 hours. Expert Fabian Raemy suggests prioritizing a complete emergency kit, water tools, first aid, and multi-purpose tools. It sounds simple, but since about half of adults do not meet basic preparedness thresholds, having even a basic plan for a few days of self-sufficiency makes a huge difference.
If you find yourself without a filter, your best move is to use heat or a DIY gravity system. You can clear out the dirt by pouring water through layers of sand, gravel, and crushed charcoal in a container with a small hole at the bottom. While this makes the water look better, it does not kill bacteria, so you still need to boil it for a few minutes to make it truly safe.
Here is the thing: many beginners get distracted by tactical gadgets and forget that water is the most critical item. If you already have camping gear like a backpacking stove or a headlamp, use those. Outdoor recreation gear is often much higher quality than cheap emergency-specific products and can save your life when you are trying to stay hydrated in the wild.
You'll definitely save some cash if you build your own kit from scratch. It turns out that DIY assembly of survival kits can save you about 30 to 40 percent compared to buying a pre-made system. It's a great way to make sure you have exactly what you need without paying for extra fluff you might never use.
But here's the thing: while building it yourself is cheaper, you have to be careful about quality. A solid kit usually runs between 200 and 400 dollars, and those super cheap 50 dollar options you see online often fail when things get real. If you're putting your own together, remember to include professional tools like WoundSeal to stop bleeding fast, as that's the kind of tech that really saves the day.
When you have to move fast during a flood, portability is everything. You'll want to keep your gear under 15 pounds so you can stay light on your feet and move safely. It's tempting to grab every gadget you own, but sticking to the basics like water purification and a solid first aid kit is usually the smarter move.
You might already have some of the best gear in your closet. High quality hiking headlamps and water filters are often way better than cheap emergency products. For staying connected, portable power stations like a Jackery or Goal Zero unit are perfect for keeping your phone charged while you're on the move.
Conclusion
Preparing for survival scenarios like sudden winter storms or getting lost in the woods feels like a lot to handle, but it really comes down to a few core skills. Whether you are learning how to purify water using natural materials or putting together a beginner wilderness first aid guide, the goal is the same: staying calm because you have a plan. It is not about being a hardened survivalist; it is about being the person who knows what to do when the lights go out or the trail disappears.
Your next move does not have to be expensive or complicated. Start by looking at what you already own, as most people find that their camping gear is actually the best survival gear for flood emergencies or snowed-in weekends. Take an hour to check your emergency checklist for sudden winter storms and see where the gaps are. Maybe you need better batteries, or perhaps it is time to practice finding water in the backyard just for the experience.
Real confidence comes from knowing you can handle a tough spot with the tools and knowledge you have on hand. Safety is not just about the gadgets in your pack, but the peace of mind that comes from being ready for the unexpected. Stay safe, stay prepared, and remember that a little practice today goes a long way when things get messy tomorrow.
Every WilderReady guide is researched, written, and fact-checked in-house against trusted references such as the American Red Cross, the National Park Service, and the CDC before it goes live. We publish under this shared byline instead of invented personas, so you always know who stands behind the guidance you are reading.