5 Essential Survival Skills That Work When Your Gear Fails
Real survival isn't about what's in your pack. It's about the survival skills you carry in your head. If your gear fails, you must know how to build a debris...
Maya Bennett
Preparedness Coach & Survival Systems Editor

5 Essential Survival Skills That Work When Your Gear Fails
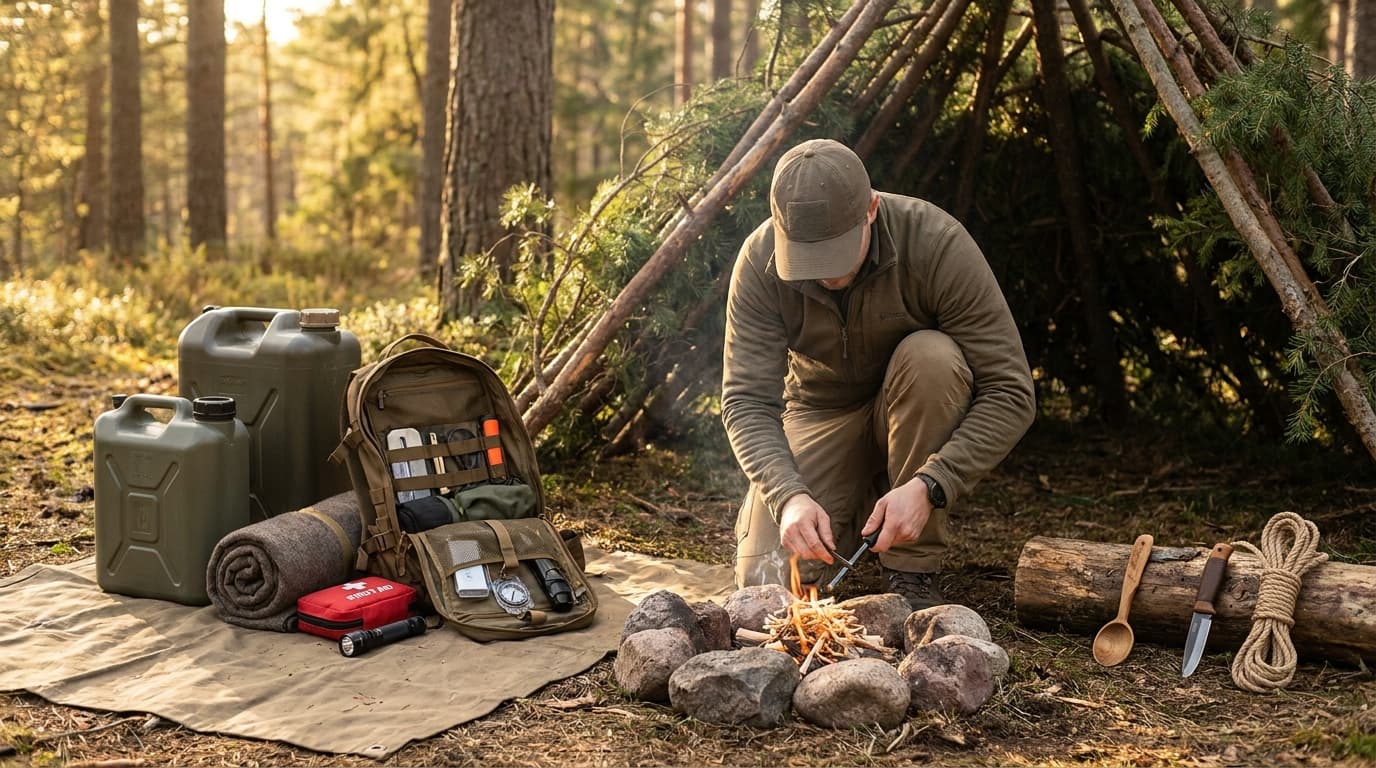
Real survival isn't about what's in your pack. It's about the survival skills you carry in your head. If your gear fails, you must know how to build a debris hut for winter survival or find dry tinder in the rain to stay alive.
Modern equipment eventually fails, but primitive techniques rely on physics. These ancestral methods are the only backup plan that never runs out of batteries.
We'll show you how to read natural navigation signs for hikers, tie the best knots for wilderness shelter building, and how to purify water with a transpiration bag.
Building a Debris Hut That Actually Keeps You Warm
A debris hut works like a natural sleeping bag. You build a frame and cover it with so much forest floor material that your body heat stays trapped inside. The big secret is keeping the inside small. If your shelter is too big, you will have a hard time staying warm because your body can't heat up all that extra air. You want just enough room to crawl in and curl up so your own warmth does the work.
To build the foundation, find a ridgepole that is a bit taller than you can reach with your arm up. Prop the thick end on a stump or a tree fork at about hip height. Lean smaller branches against the pole to create the ribs of the hut. Make sure these ribs are close together and secure so they can hold up the weight of the heavy debris you will pile on later. This frame is the skeleton that keeps the whole thing from collapsing on you while you sleep.
Imagine you are out in the woods and the sun is going down fast. Your gear failed and the wind is picking up. You find a sturdy branch and start leaning ribs against it, then pile on wet leaves because that is all you have. Even if the materials are damp, piling them two feet thick creates enough insulation to keep you alive. As you crawl inside and compress the leaves, the space feels snug and your shivering finally stops. It is like being wrapped in a thick, earthy blanket.
Key insights:
- Select a ridgepole that is longer than your reach to give yourself enough room.
- Set the high end of your pole at hip height to get the right shape.
- Pile your insulation at least two feet thick to keep the heat in.
- Wiggle around once you are inside to compress the materials and make a snug fit.
- Place extra branches on top of the debris to stop the wind from blowing it away.
The Ridgepole and Ribbing Framework
The ridgepole is the spine of your survival shelter, and it needs to be sturdy to hold up all your insulation. Think of it like a cat finding the perfect cardboard box; you want it just big enough to fit, but small enough to stay cozy. Find a pole slightly taller than you with your arm stretched up and prop the high end on a stump or tree fork at hip height.
Imagine you are out in the woods and your modern gear fails or gets lost. Instead of worrying, you find a downed log and lean it into a low tree fork. As you lean smaller branches against it to form ribs, you are basically building a natural sleeping bag that keeps your body heat right where it belongs.
Key insights:
- Pick a ridgepole that is longer than your total height with your arm stretched out.
- Prop the main pole at hip height to keep the internal space small and warm.
- Secure the high end in a tree fork or on a stump so it does not collapse.
- Lean rib branches close together to create a solid frame for your leaf debris.
The 3 Best Knots for a Sturdy Wilderness Shelter
Look, your tent might fail, but a good knot won't. To keep a heavy ridgepole from crashing down in the middle of the night, you really only need three knots in your toolkit. Use the Clove Hitch to get things started, the Square Lashing to bind your frame, and the Taut-line Hitch for any lines that need to stay tight. These are reliable because they stay put even when things get messy.
Here is the secret: wood is alive, even when it is dead. As your shelter branches dry out over a few days, they actually shrink and shift, meaning a basic knot will eventually get loose and leave you with a wobbly roof. These three specific knots are designed to bite into the wood and stay secure even as the structure settles and the grip changes.
Imagine you are out in the brush and the wind is picking up. Your fancy gear just ripped, so you grab a ridgepole that is a bit taller than you are with your arm stretched up. You prop it up at hip height and start lashing. Even as the wood dries and the wind tries to shake it apart, your frame stays solid. It is like building a sturdy little nest that won't budge.
It is a great feeling to know you can take care of yourself when your store-bought gear lets you down. Primitive skills are the best backup because physical stuff eventually fails or gets lost.
Key insights:
- Start with a Clove Hitch to create a firm anchor on your support beams.
- Use a Square Lashing to join horizontal and vertical branches so they do not slide.
- Tie a Taut-line Hitch on your tension lines so you can tighten them as the wood shrinks.
- Make sure your ridgepole is at least as tall as you are when your arm is raised.
- Keep the high end of the pole at hip height to keep the space small and warm.
Finding Dry Tinder While It’s Pouring Rain
When the sky opens up and the forest floor turns into a sponge, finding dry fuel seems like a lost cause. Most people make the mistake of looking down, but that is where the water collects and stays. You need to look up instead. Dry tinder is almost always hiding in plain sight, protected by the vertical position of dead standing wood or the natural canopy of larger trees. This wood stays dry because gravity pulls the rain away from the fibers before it can soak in.
The secret is that moisture rarely penetrates deep into dense wood or under thick bark quickly. Even in a heavy storm, the core of a standing dead tree remains seasoned and ready to burn. You just have to work a little harder to get past the wet exterior to find the fuel that actually works. Think of the wet bark like a raincoat that protects the valuable heartwood inside.
Imagine a hiker caught in a sudden deluge without any modern gear. Everything around them is dripping and the air is freezing. They do not waste time digging through wet leaves on the ground. Instead, they find a standing dead cedar and use a knife to shave away the soggy outer layer. Underneath, they find bone-dry, fluffy inner fibers that look like bird nesting. This small handful of dry material is the difference between a warm night and a dangerous situation. It is a reminder that nature often provides what you need if you know where to look.
Key insights:
- Search for dead standing wood that has not touched the damp ground yet.
- Peek under leaning trees to find a dry shadow where the trunk has blocked the rain.
- Shave off the wet outer bark of branches to reach the dry heartwood underneath.
- Look for tiny, brittle twigs on the underside of evergreen trees near the main trunk.
- Stash your dry find inside your shirt to keep it away from the damp air while you prepare the fire.
Natural Navigation Signs Every Hiker Should Know
When your GPS battery dies and thick clouds hide the sun, you aren't actually lost. Nature leaves breadcrumbs everywhere, but you have to know how to read them. These ancestral skills are a necessary backup because even the best gear in your pack will eventually rip, fail, or be stolen. Relying on your surroundings is often more reliable than a piece of plastic or silicon that can run out of power.
Imagine you are deep in the woods and a sudden storm rolls in, blocking out the sky and soaking your electronics. You need to find your way back to camp before dark. Instead of guessing, you stop and look at a lone tree sitting on the edge of a clearing. You notice the branches on one side are much thicker and reach further out than the others. Since plants crave sunlight, those heavy branches are almost certainly pointing south to catch the most rays.
Using just one sign is risky. A single tree might be shaped by a weird wind tunnel or a nearby rock. That is why seasoned hikers always look for a consensus among several natural indicators. It is about building a map in your head by looking at the ground, the trunks, and the leaves all at once to confirm your path before you take a single step.
Key insights:
- Cross-reference at least three different signs like moss growth, wind-blown debris, and canopy density before choosing a direction.
- Look for indicator trees on the edges of clearings where sunlight and wind have the most obvious impact on growth patterns.
- Check for moss on the cooler, shadier side of rocks, but do not rely on it alone since dampness can make it grow anywhere.
- Observe the lean of tree tops to identify the prevailing wind direction, which usually stays consistent in a specific valley or ridge.
- Watch for snow melt patterns on hillsides, as the southern-facing slopes will usually lose their snow and ice first.
Using a Transpiration Bag to Purify Water
How do you get clean water when you have no filter, no pot to boil water, and no stream in sight? You pull it from thin air using a transpiration bag. This technique relies on the natural process of plants releasing moisture through their leaves. It is a vital backup because, as the saying goes, the gear in your bug-out bag will eventually rip, fail, or be stolen. By trapping that plant breath in a clear plastic bag, you create a mini greenhouse that produces clean, distilled water.
Think about a hiker who loses their pack in a river crossing or finds their expensive ceramic filter cracked and useless. In a dry environment, that could be a death sentence. But if they have a simple clear bag tucked in a pocket, they have a lifeline. For example, by finding a sun-drenched broadleaf tree and bagging a leafy limb, they can collect enough water to stay hydrated while they find their way out. It is a quiet, hands-off way to survive using only the resources around you.
This method works best when you plan ahead. You want to find trees with big, green leaves that are soaking up the sun. The hotter the sun, the more the tree sweats, and the more water you get to drink. It takes time, so you should set your bags up early in the day and let them work while you handle other survival tasks like building a shelter.
Key insights:
- Pick healthy, non-toxic broadleaf trees and avoid evergreens or poisonous species to keep your water safe.
- Ensure the branch is in direct sunlight so the heat forces the plant to release moisture quickly.
- Tie the bag with a very tight seal using cord or tape to prevent any water vapor from escaping.
- Angle the bag so the water pools in one specific corner for easy collection.
- Add a small, clean stone inside the bag to weigh down the collection point and keep the water away from the leaves.
Frequently Asked Questions
Conclusion
So what does all this mean for your next trip into the woods? It shows that survival skills are not about what is in your backpack but what is in your head. Whether you are learning how to find dry tinder in the rain or how to purify water with a transpiration bag, these techniques work because they rely on the rules of nature. When gear breaks or gets lost, these primitive methods keep you safe and give you a way forward.
You do not need to wait for an emergency to try these out. Your next move should be to practice one of these skills on a sunny afternoon hike. Try tying the best knots for wilderness shelter building or look for natural navigation signs for hikers while you are on a familiar trail. Building that muscle memory now makes everything easier if things ever go wrong. It is much better to learn how to build a debris hut for winter survival when you are not actually freezing.
The bottom line is that the forest provides everything you need if you know how to use it. Learning these skills is about more than just staying dry or finding your way back. It is about feeling at home in the wild and trusting yourself. Stay safe out there and keep practicing.
Send it to someone who should read it next.
About the author

Maya Bennett
Preparedness Coach & Survival Systems Editor
Builds practical checklists, kits, and preparedness routines that help beginners turn emergency planning into repeatable action.
View all articles